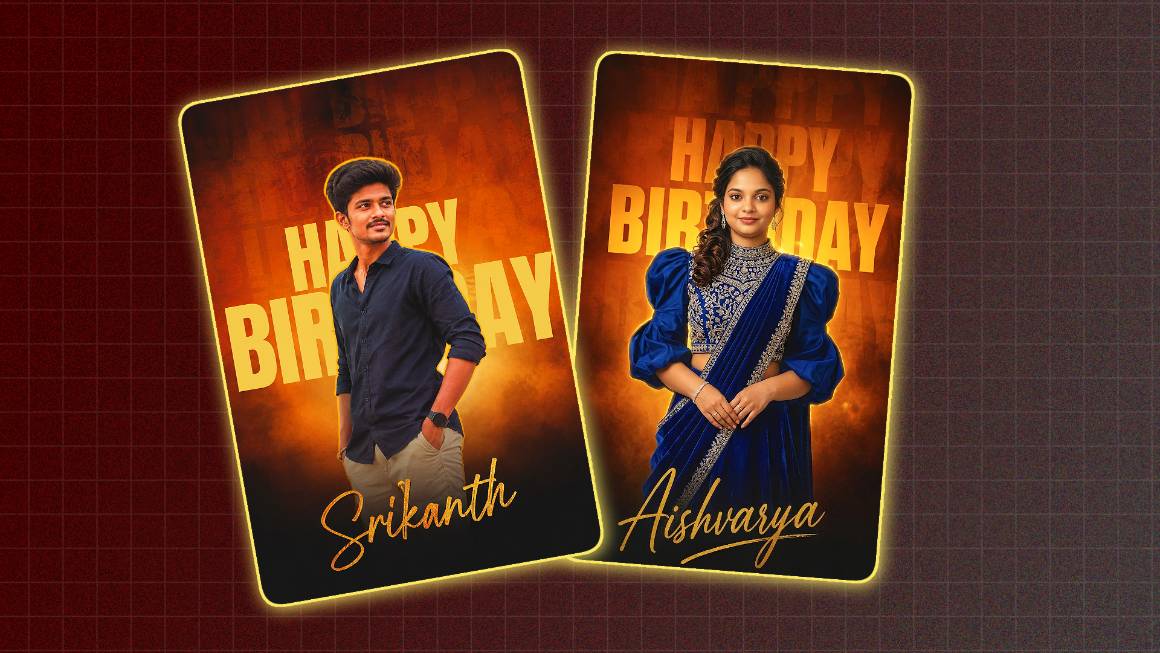

How to create a happy birthday photo editing in the currently trending cinematic style, which can also be edited in high quality in HD very simply in the Alight Motion app, I will explain it clearly to you, so read the article completely and you can also edit with the photo of your choice, but the special thing about this photo editing is that you can also edit boys or girls in the same style and if you want to edit and give it to someone, then this style is definitely worth trying. Let’s see what files you need to gather for such photo editing.
- Background image with a red and black background
- Two font styles
- Your own photo, which should be in PNG format with the background removed.
- You should have installed the Alight Motion application on your mobile.
Now let’s see how to edit using these.
New Project Settings
First, you open the Alight Motion application. Then, at the bottom options, there is a plus icon in green colour; click on it. Then a pop-up window will open. There, set the project name, quality, as well as background colour, bit rate, and frame rate as desired or make adjustments and click on the Create option.
Background Image Adding
Then again, click on the plus icon option in green colour. Then, if there are some options on it, there will be a media option; click on it and add a background photo from the gallery.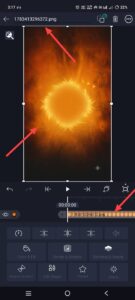 Or there will be a shapes option next to it; select this shape option. After selecting, now you have to fit this shape or background photo to the screen or resolution you have taken. For this, you click on the three dots option in the right side corner, then there is a fourth or fifth option there, you will see that there is an option called Fill Composition Area, if you click on this, it will automatically fit the screen, but if you use shapes, you will have a color option in the options at the bottom here, click on this, in which you will have a gradient option, after clicking on this, you will have two colors left and right, in which you take the red color on the left side, take the black color on the right side and move the gradient of those colors as you want, the colors should be
Adding Happy Birthday Text in the Background
Apart from the background, you will also have to add another text after the photo, first for this text, after you come back again, click on the plus symbol in green color, then on the right side you will have the Add Text or Create Text option, click on it directly for text editing It will take you to the page, type there Happy Birthday, which should be in two lines,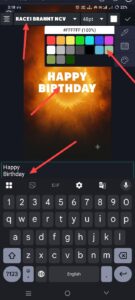 You should put Happy on top, Birthday text should be in 2 lines below and there you should apply a font style to it, for this, if we have some fonts above, then it should be in capital letters, otherwise you should type in capital letters while typing. After that, it is enough to use colour for this. Now you should align this text centre and put it in big size at the top. After placing this, click on this text layer. Then there are some options below: blending and opacity. Click on this; if you click on it, you will again have an option called Multiply. Why is this useful? This text will blend into the background.
Adding Your Own Photo
If you want to add this own photo, first you have to remove the background of your photo, then the photo should be in high quality, we also have other applications to remove this background and the same,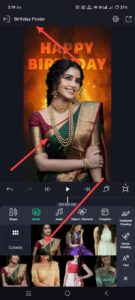 But if you can’t remove it in this one, it will remove the background of the photo only if it is in a single color, if it is in multiple colors, it will not remove it perfectly, so you use any application, for example, PicsArt, in this application, simply add your photo and there is an option called Background Remove, if you click on it, it will automatically remove the background. Then save the photos from the other side and add them here. For this, you have to come back again and click on the plus icon option; then there will be a media option. Click on it and add your own photo from the gallery again. After adding, you have to align this photo in the correct centre.
Applying Feather Effect
For this, first click on the layer option of your own photo. There will be an option at the bottom. 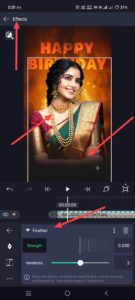 Click on it. There will be an Add Effect option. If you click on it again, you will go to effects. Search for the effect called feather and click on it. Add it. Here you only need to take the standard settings. Then, using the options there, you need to change the angle. We want this effect at the bottom of the photo. So, change the angle. After applying this effect, you need to take another shape. For this, you need to click on the plus sign again and click on the shape option. Take a rectangular shape again. After taking it, apply it to this too. In this circle, apply a black colour to one side and keep the other side transparent. Apply this and add this shape to the bottom of the photo.
Adding a Name
For this, just like we added text at the start, click on the plus icon option and click on the text option.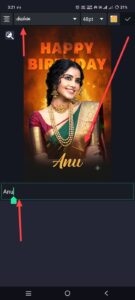 Here you have to enter your name. After entering, apply the font style. This font is in the curve style. Then select the colour in the Yellow colour. Adjust it properly at the bottom. After making the adjustment in this way, we are almost done with photo editing. Finally, we need to add another text. You added the happy birthday text at the start. In the same way, click on the layer option. Click on the happy birthday text and duplicate it. Duplicate it, reduce the size a little, and add it again in the background. Add it behind the person. If you add it like this, it will be complete.
Final Check
After we have done photo editing and video editing, we should finally check everything. If it is a correct video, then check whether there are transition effects and correct timing layers. If it is photo editing, then check everything once. When you are editing a photo, you should use only high-quality images; then you will get a good output. Now, to save this photo, there will be a share option in the right-side corner. Click on this. Then here, select Current Frame as PNG. If you click on this option, it will be saved as a photo. Then there will be an export option at the bottom. Click on it and save the photo.
How to edit a photo using AI
You can easily edit it in the same HD quality and style using AI. For this, we need a prompt. First of all, open one of these applications, ChatGPT or Gemini AI. Open it and upload your photo to it. Upload it. I will give you a prompt at the end of this article to edit this photo. You can completely copy that area and paste this text under your photo in ChatGPT and just submit. It will take some time and come out in HD quality as you want. However, you may have a doubt here. There will be a separate one for boys and a separate one for girls. There is no such aspect. This teaching can be applied by all people, whether you are a boy or a girl. This is the text material itself.
Prompt
Create a premium cinematic birthday poster using my uploaded photo. Keep my original face 100% unchanged with natural skin texture and facial details. Use my original pose from the uploaded image (do not copy the reference pose). Add a warm orange and golden cinematic background with a smoky atmosphere, soft glow, and large faded ‘HAPPY BIRTHDAY’ typography repeated behind me exactly in the same style. Add a thin golden outline around the subject, cinematic lighting, high contrast, soft bloom, and premium colour grading. Place my name ‘Lavanya’ at the bottom in a large, elegant, golden handwritten signature font. Keep the composition clean, luxurious, and professional in 4K quality, vertical 9:16 poster, realistic, ultra-detailed, sharp focus.
