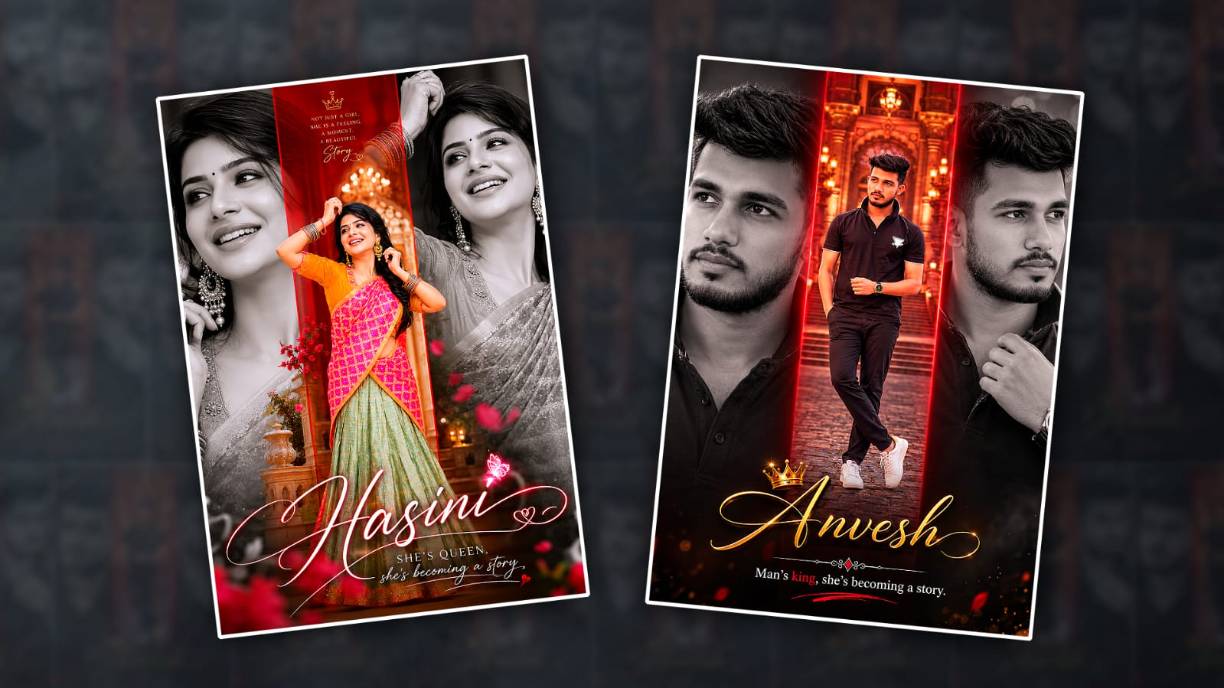

In this article, I will explain clearly how to edit a luxury, cinematic trending Photo in Kinemaster. This is a video editing application, but we can also use it for photo editing. We can do professional photo editing; there are many options using which we can do photo editing. Usually, this Kinemaster app is also available in the Play Store, but in this, you can do professional video editing; you can edit wedding invitations, first birthday invitations, videos, promos, reels, etc.
Editing Sources
- You need one or two of your own photos.
- You want a luxury image in the background, for example, a devotional image or a temple background in a dark colour.
- Stylish fonts
- Kinemaster installed on your mobile.
So now let’s see how to edit it step by step.
First open this application and there you have everything,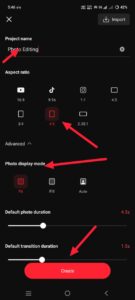 There is a plus icon in this one too, click on it, then enter the project name in it, then select the resolution or ratio and also set the background frame rate and create option and click, it will take you to the next step, but when we edit, we have to set everything and set the settings in advance, then click on the create option, when it opens here, it will take you directly to your gallery.
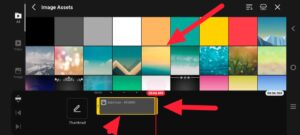 Add any image to add in the background; whatever images we have gathered, add an image related to the temple. After adding that image, now you have to fit that image to the screen with your fingers or with the scale option available in it. After doing that, now you need to make a colour adjustment for this. For this colour adjustment, simply click on this layer. Some options will appear on the right side. If you scroll down, you will see the adjustment option. There are many options related to colour. You can also make colour adjustments using them.
Main Photo Adding
After that, you need to apply a photo.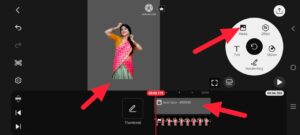 Our photo. For this photo, you come back again and click on the layer option on the right side. In the circle, we have some options; there will be a layer option. Here, you can remove the background of this photo without even having to remove it. There is an option in this. So, after adding it, adjust it here. Also, increase the size in the centre. For this size, you click on this layer again, and some options will appear on the right side. As mentioned earlier, go to the adjustment option, and you can You need to make an adjustment and then remove the background of this photo. For that, if you scroll down in the options on the right side, there is an option called Background Remover or Magic Remover. Using this option, you can remove the background. It will simply remove the background. However, this option can be used not only for photo editing but also for removing the background in videos.
Feather Effect Applying
After adjusting your photo like this, you should also apply smoothness to your photo.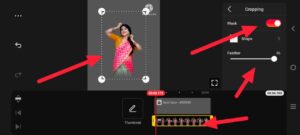 As mentioned earlier, in this KineMaster, not all the options are available. When you click on it, it will come on the right side. Click on the right side. If you click on it, scroll down, and there will be an option called Crop. In this crop, there is an option called Smooth or Feather. Using this, you can increase the smoothness.
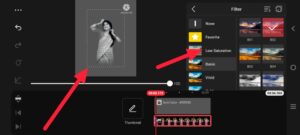 After adding it to the photos, you should apply black and white to this photo. For this, if you come back and click on the layer, in the options in the circle on the right side, there will be an option called Effects, in which there will be an option called Filter. If you go to Filter, you will have an option called Black and White Filter. Select it and apply it. The photo will turn into black and white.
Adding Design Element
After changing, now we need to add a rectangular shape. In this, we will have many colored images.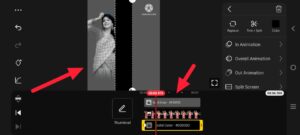 If you come back and click on the Media option, there will be many images in it. Add an image with white colour or black colour in it and leave space on the left and right sides in the middle. Adjust whatever rectangular shape is in the middle from top to bottom because we need to add another photo of our choice on top of it.
Add Another Photo
After applying our own photo like this, now we need to add another photo of our choice.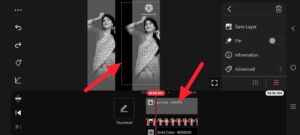 For this, you come back and click on the media option again. Click on the layer option. Click on the media option. Add another photo from the gallery. Improve the quality of this photo as mentioned at the start. Go to the adjustment option and improve the quality. After doing this, add smoothness to this photo as well. Then, if you can, add another photo. How about adding the photo you added in the beginning, one left photo, one right photo, and another photo in the middle? You can add the rectangle you took earlier and apply its edges in red. You can also see the edges in the options on the right side.
Name Adding
Now, let’s add a name. For this name, come back and click on the layer option. 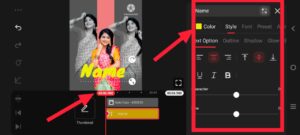 There will be a text option. Click on it. Here, you will get the edit option. There, enter the name you like. Enter the name and apply the font style and colour there. Apply all these and add the Text at the bottom. After adding the name, finally add some effects like PNG images or red-coloured leaves. If you add it above, the photo editing is almost done. But this photo editing is something that girls can edit; boys can also edit.
 Now, if you want to edit this photo, when you are editing, there will be a cursor on the timeline, right? Put that cursor, that pointer somewhere, then click on the view option on the left side; then there will be a capture and save option. If you click on it, that photo will automatically be saved in the gallery. How can you edit a photo?
Increase Photo Quality Using PicsArt
However, if you want to improve the edited photo in high quality, you will have to use another application; its name is PicsArt. Open this application and add the photo you have saved earlier to it. Add it and click on the tool option on the left side again. In it, you will have the Enhance option. When you click on the option, this will only happen if your mobile has mobile data on. Then it will start processing. It will take some time- one to two minutes- and it will convert your photo to HD quality. You can save the photo you have made by clicking on the arrow mark on the right side and then clicking on the save option. If you have any doubts about this, ask in the comments section.
Boy Prompt
A The picture that is uploaded. Create an intensely-priced, cinematic look, the same dress eye, and an elegant,t calm expression. Use a dramatic black-and-white close-up of the story, with a vertical transparent pink strip in the middle. Within the red stripe, a smaller full-body portrait of the area is gracefully positioned in front of a gorgeous palace fashion backdrop. Add gentle gloss lighting, shallow depth of discipline, rich evaluation and top-rate editorial photography. Have stylish handwritten print at the bottom with the name “Aditya” and have the slogan: “guy’s king, she becomes a story.” Ultra exclusive, dreamy, luxurious wedding ceremony album beauty, high-quality cinematic colour grading, vertical composition, 4K.4:5.
Girl Prompt
A Uploaded image. eyes the same dress with a luxurious cinematic look, and creates a stylish and calm expression. Use a dramatic black-and-white close-up as a story, with a vertical, transparent red bar in the centre. Place a full-frame, smaller photo gracefully standing in front of a castle-style backdrop decorated with crimson stripes. Add soft incandescent lighting, shallow intensity of field, rich evaluation, and top-quality editorial photography. Contains elegant
The hand-painted print is minimalist with the name “Divine” and the slogan: “She is a queen, she becomes a story.” Ultra-exclusive, dreamy, luxury wedding-ceremony album beauty, high-sacrifice cinematic colour grading, vertical composition, 4K. 4:Five
