Hello everyone, and welcome to our page! In this article, I will teach you how to use your personal photos to create a remarkable video album, specifically within the Alight Motion app. It shows at its best, yet it is a bit accessible enough for anyone to stick to while accomplishing expert results.
Alight Motion Editing
First, open the Alight Motion app. Once opened, you’ll see a green plus icon; tap on it. You will then see several options: check the project name, background colour, resolution, and frame rate. Also, choose whether you need the video horizontally or vertically or not, then tap ” Create Project. 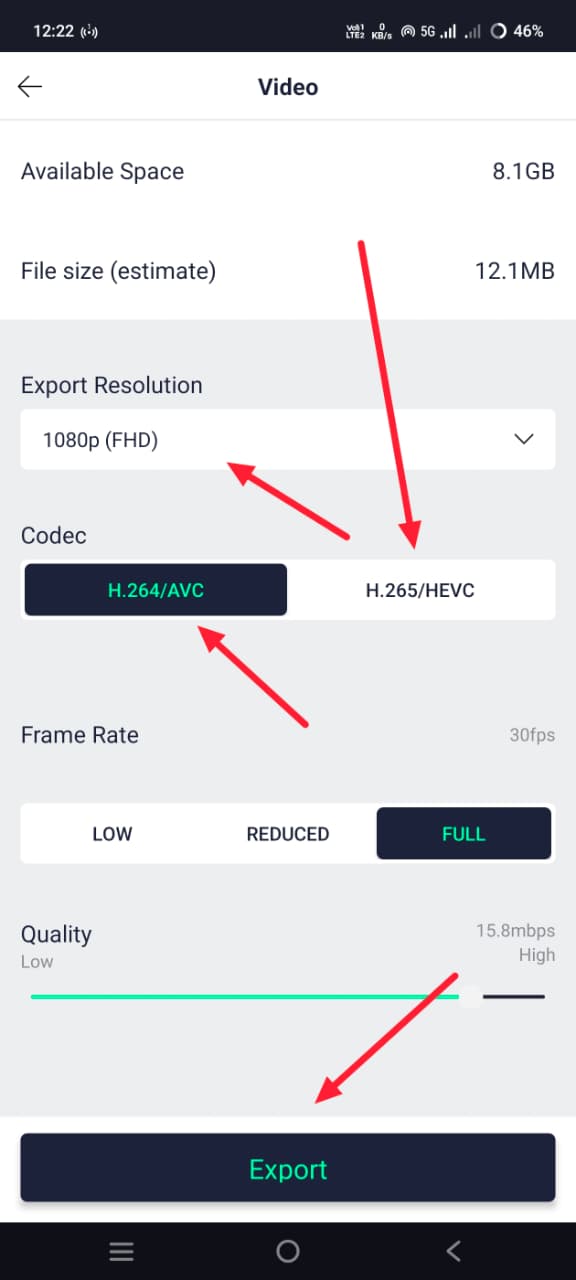 Clicking the (+) icon brings up several options, including sizes, media, factors, and song. First, identify the story, which may be a blurry image or shape. If you want to add a photo, click on ‘Media’; If you select a form, click ‘Template’. For example, I click on ‘Media’, which immediately takes you to your gallery; Then paste any picture. Once selected, enlarge the clip to fit the best time in your video. TBird-click on video or music to apply effects. Select ‘Default Settings’ and change the blur you want on your historical past image. Finally, make sure the image stays within the story and resize it so that it completely covers the screen.
 Now, we have to add the images one by one and animate them in 3d considering this is a distant album; a 3D effect gives it a professional look. Just as you added a background image earlier, add another photo now. Make sure to collect high-quality HD photos and save them in a folder on your mobile beforehand. Once saved, select a photo; the aspect ratio doesn’t matter, but if the photos aren’t HD, you should apply specific effects I will mention. First, as mentioned earlier, go to the ‘Effects’ section and follow the results for ‘Sharpen,’ ‘Gamma, ‘ ‘ Exposure, ‘ etc. Adjust the settings to suit your image. After importing the image, animate it. Now, regarding this animation, you might want to set the duration of the video score based entirely on the BGM (Historical Past Tune) or the music you decide. Similarly, add each image one at a time and set the desired duration for each.
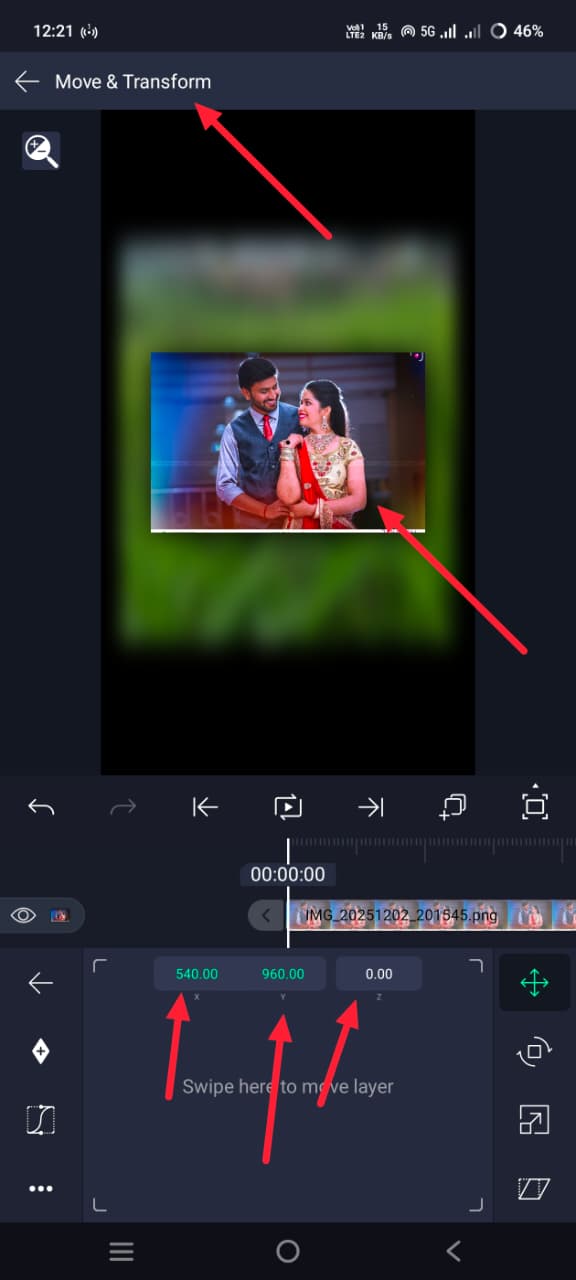 Because we develop wedding fashion album arrangements, you may be able to create images with a large variety of images; Animating each one can take a lot of time, especially for 20 to 30 snapshots. If you want to edit some detailed images without hassle, I can share a trick as a way to simplify the process. Let’s explore how to do that.
Using Duplicate Option
You’ve already created an animation with a specific image; Now repeat that for the image layer. In Alight Motion, you can test this by clicking the plus sign (or options menu) and choosing “Duplicate” or “Copy Layer”. Once copied, circle to the fraction of the duration of the individual layer and paste the copy there (or duplicate it and slide the new layer into that position). Then click on the image layer you just delivered; This at least reveals a fixed set of alternatives. Select the first option, “Colour & Fill”. This opens further options, including ” Colour” and “Media.” Click “Media”, go to your photo gallery, and select the new photo you want to use; The original image can be mechanically replaced with a new image. Finally, change the crop of the image as desired. You can easily create projects using any number of photos this way. Since you copied the initial layer, all the effects applied to the original photo are automatically applied to the new photo as well, making the workflow much faster.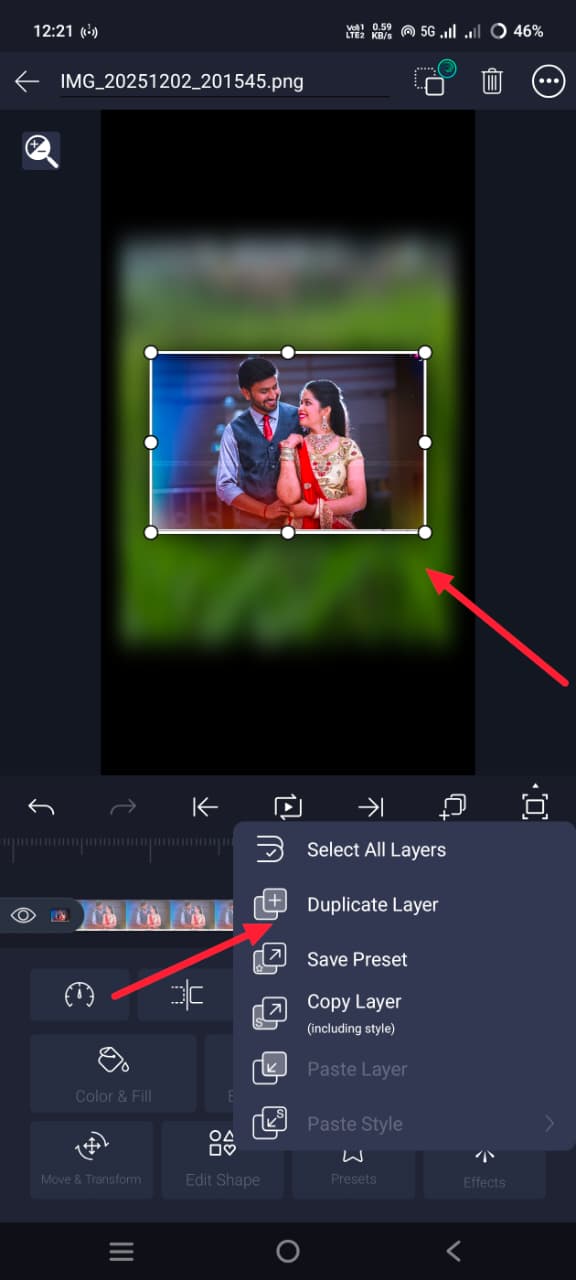 Many people waste time applying the same or slightly different animations to each photo individually because they are unaware of this trick; however, this technique allows for much simpler editing. If you need to use the same results, stick exactly to the type I defined earlier. However, if you choose a single animation fashion, avoid reproduction, glueing, or double work; As an alternative, paste or upload each image, create the area where you need animation, practice your desired animation results, and then customise the specific settings for one effect to achieve the look you need. After the conversion, watch the entire video from start to finish to make sure the animation results are successful before exporting. However, you can add the layer before exporting.
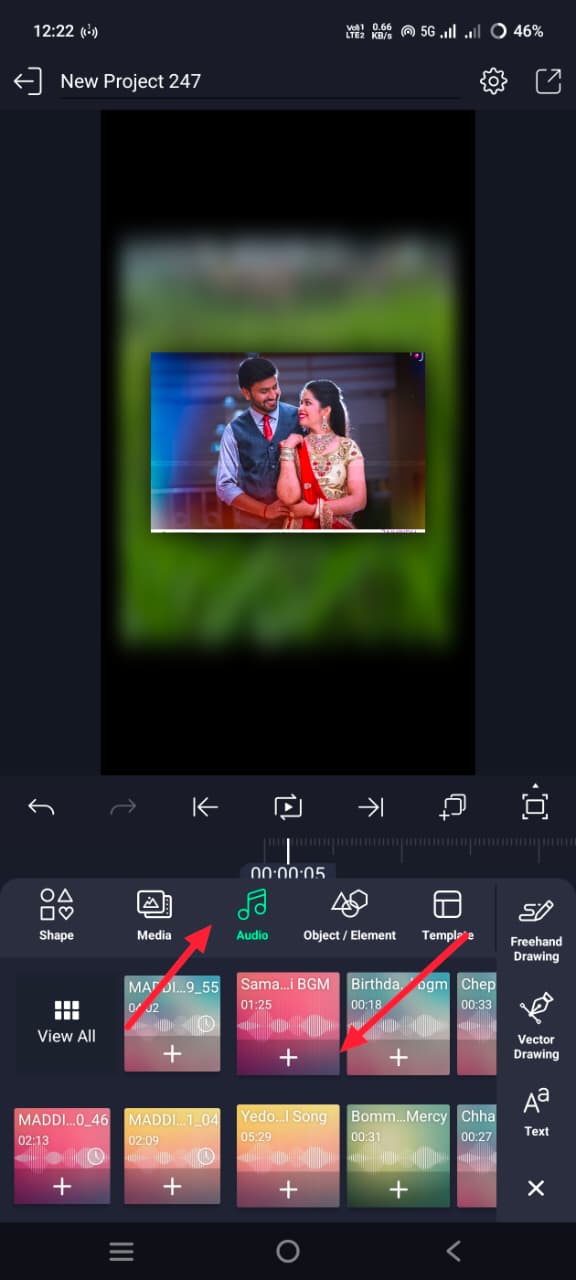 To upload music, find the audio or text option placed right next to the image access option; Click on it, select a song from your gallery and trim the extra components to match the timing of your edited video. If you’re familiar with the Alight Motion modifications, the instructions are easy to follow; Clicking on a track will bring up all the important controls for trimming or trimming a song or video. Finally, track the fade results at the start and stop of the track. You don’t need to use a specific “effects” tool for this; Be sure to press the tune level, set the audio option on the timeline, use the keyframe feature on the left to set up professional fade-in and fade-out results, and enhance the video quite significantly along the way.
If you want to export the video, click on the ‘Share’ option inside the pinnacle right corner; Then select your chosen adequate settings and proceed to export. A not uncommon mistake that many people make is saving the video without delay without first configuring the output settings; Doing this can compromise the quality of the video and keep the final result from looking expert. So when you export, you have to check the resolution, frame rate, codec and bitrate carefully before clicking ” Export ” to save the video. Following this process will ensure that your edited video looks professional and plays easily.
Editing Tip
I’ll share a handy tip for your video editing: you can create animations such as a “slideshow” style effect using layers and photos. You can achieve amazing edits using the effects available in Alight Motion. One specific effect worth mentioning is “Flip Layer.” There are also extensive 3D options; when editing, if you navigate to the 3D section, you’ll find a variety of effects. As you apply them individually, you can further customise the settings to achieve the look you want. I hope you’ve understood the article overall. If it’s clear to you, give it a try, keep practising, and you’ll definitely progress from a beginner to a professional editor. If you have any further questions, please leave a comment below this article.
AM Presset Import
Hi, I’m Srikanth, the founder of Srikanth Digital Works. I concentrate on Photo, Video editing, visual design and virtual content creation. Through this website, I provide editing tutorials, suggestions, and industry insights to help builders enhance their virtual capabilities.
Hi, this is a comment.
To get started with moderating, editing, and deleting comments, please visit the Comments screen in the dashboard.
Commenter avatars come from Gravatar.