Hello Friends, welcome to another topic. Today, we come to our topic: ic and today, let’s learn how to create Annaprashan invitation videos professionally in the Kanemaster application.
- Usually, we use Premiere and PC software for this kind of professional editing, but now I will show you how to do it on mobile. The topic is very interesting. Read fully and learn completely.
- First, you need to take a background.
- The background,d which is in white color also takes a cartoon image related to Annaprash, and also takes a background set of your choice, such as a font style.
- Now open the KineMaster application and do the project above, then select the 16:9 ratio.

- The,n elow we have the create opti. If we click on it, we will go directly to the media, take the image or video that is on the white background, and see the complete interface. On top of that, we have to create the title. For these titles, we can also use another third party.

-
Applications can also be created in KineMaster. Otherwise, if we admit everything, we may not get a perfect video.
How to create titles in Kinemaster
- First, we take any image or video tap on the media and then tap on the same video on the right side we will get some options if we scroll down there is an option called background click on it then after that another option will appear transparent tap on it and back now pan and zoom option will appear to tap on it tap on equal to tap on it and move to left or right whatever image is there if we move to left or right we will see the background is transparent.
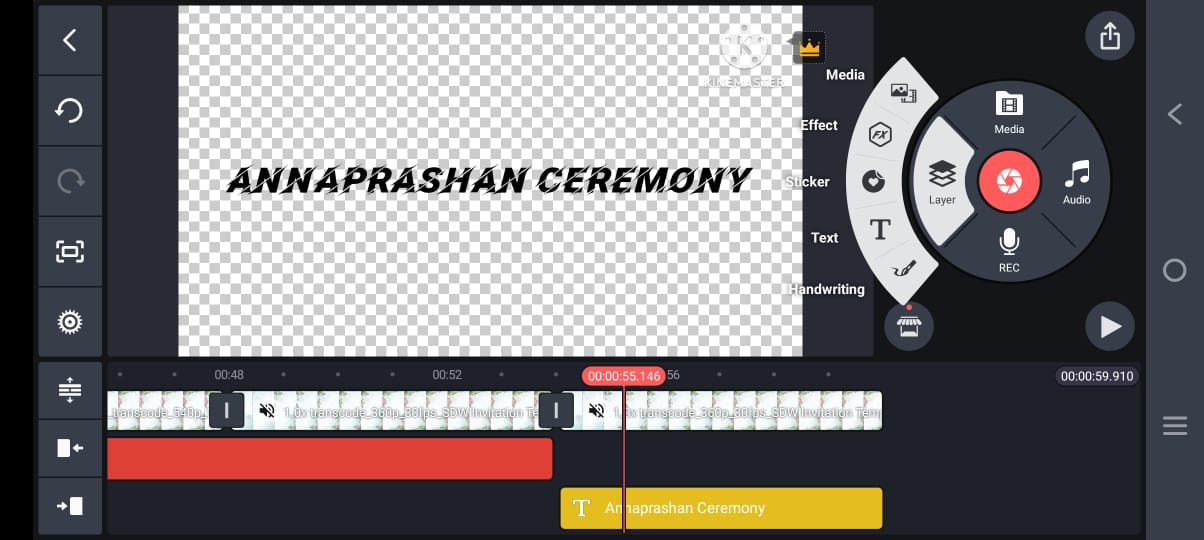
- Now we need to create a title for that tap on the layer, then tap on the text title, and whatever you want to write, that title type Annaprashan Ceremony Invitation here. After adding colour to it, now drag it for 6 seconds.
.jpeg)
- Now let’s animate it. For that, tap on the text layer, then on the right side options. If you scroll down, you will see an option called transform. If you tap on it and scroll down again, there will be a scale option, and you will come to the starting point. Add a keyframe and set it at 0.4. Then we come to the ending point of the ending layer, and we have to keep reacting and put it in 0.5 duration scale now the back comes and plays it we see zoom out from zoom in this you have to set it like this after creating all the titles all in the same way follow the same process create like this should be done so now let’s know how to create the next slide.

- First, as you said at the start, after doing it in Transparent, we have created a title. Now, we will see a view option on the left side of the title that we puputIfIfe tap on it, we will see a capture and save option. If we tap on it, that one image will be saved in a PNG format gallery. Now we will add the saved imageton the title, so you can create all the titles, and if you add any dividers and frames, the title will look very good.
.jpeg)
- No,w let’s learn how to create a second slide, where you copy or duplicate the background image or video in the first slide, and we get into the next slide.
- First, if we add an image or title and create everything, we will do a lot of double work. I will tell you how to create it smartly. Click on the above, and on the right side,e we will see the reply option. Tap on it and just tap on the next title you want to add. It will automatically go to reply. Whatever you want to add effects, if you create the first slide perfectly, you can easily create all the other slides. By doing this, the project is completed quickly.
Now, let’s learn how to create with photos.
- As we learned in the first, a text should be added either on the right side or on the left side. If you take the text on the left side, then you should add a photo on the right side, or if you take the right side, add on the left side. Should be done.e After adding a photo, let’s add a draft effect or video.
.jpeg)
- Now, after adding the video like this, we have to apply the feed out to this video, andlastlye add the music you like and finally, add the cinematic frames. For that, there is an option called effects on top of thelayereIfff you go above it, you will see cement layers, a kind of message board. Take only the red wide in it; it suits us very well for the video.
.jpeg)
- So after creating it like this, the entire video will be complete now if you tap this video on the share option,n as seen in Kind Mar,c choose the quality you like,ike select the frame rate, and tap on export. You will save this video in the gallery,ry and the video is complete.
- Also, if you have any doubts about this article, you can let us know in the comments section below. See you again with another good topic. Thank you for reading this article till the end.
- Even if some people have video editing skills, they still doubt whether this application can be used professionally. Try it as you think it will work 100% kinemaster application can be said to be the best application among mobile applications because most of us have editing skills, but wait for pc or computer. Not all may have computers, so you can edit any way you like in this application on pc. Similarly, in the same quality as a professional in this application, it can also be edited on a mobile device. First, if you want to do eeditingg then you should know the options of this application completely, practice, and try all the options available in this application store. There are many effects in this application store. Start the desired editing.
- To make your video look attractive, you should first make sure that the text and background you havchosenen arcolourfulul. When you take pictures or footage that has colour, you should use the adjustment option and increasecolourcolor in them.
Note: Please follow these steps for files and fonts
Copy the bold text below, then open a new tap paste it in the URL search bar
Fonts
https://www.mediafire.com/folder/6wgnwcnvw6mf4/Fonts
Music
https://www.mediafire.com/file/tv2lox49ainoxev/STC341_%255B0A1E1BA%255D.mp3/file
AM Presset
https://alight.link/wFpb2kciq8wZfAGL8