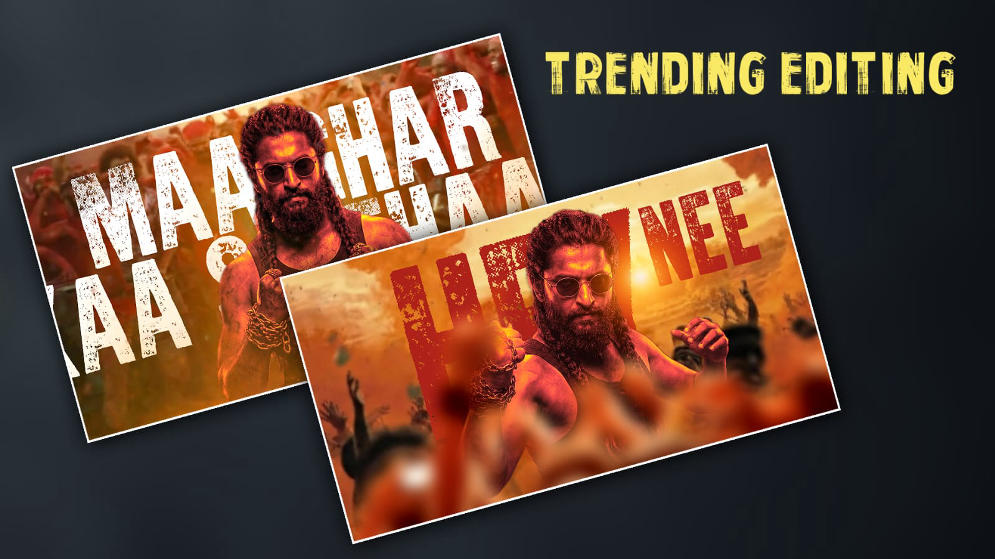
Hello guys, welcome to our next article. I will tell you how to edit a lyrical video with movie photos for Instagram or status. The video will be very amazing, professional and cinematic. Read this article completely, and you can also edit it in a very simple way. I will explain it step by step in the Alight Motion app. Usually, we do lyrical editing on our mobile, or if we want to do it cinematically, we use computers, but I will explain it to you in a simple way on our mobile. You can also edit it professionally in the app using the Alight Motion app. Let’s find out how to make it very simple and professional.
Create New Project
First, open this application and take any project. Here you have to select vertical for status. There are resolutions in this vertical as well. After that, you can edit it horizontally.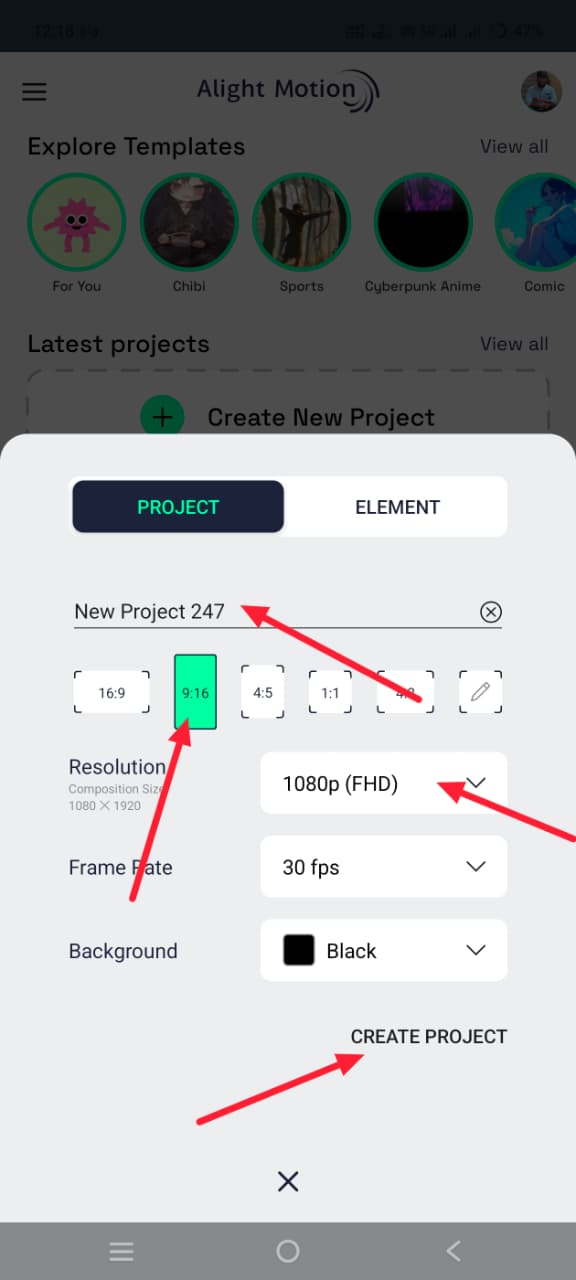 Select the resolution, background, as well as the frame rate and bit rate, and click on Create Project. If you click, the application’s timeline will open, in which we can add photos, music videos and edit them. Here you have to add any image, cinematic poster image, in the background first. For this, first you have to click on the media option on the left side below. After clicking, it will take you directly to our mobile gallery. From there, you have to select a photo. But here you should know that whether you shoot it vertically or horizontally, you will rotate the image as a result. So, for example, if you want to edit for a vertical Instagram story or for fame, you need to edit it vertically.
 If the image is horizontal after including the image here, you need to rotate the image. For this, go to the Move and Transform option. There you will have some options on the right side, in which there is a rotate option, through which you can change it to 90 degrees. After that, after coming back, if you edit it horizontally, there is no need to rotate. Now we are explaining it horizontally, so there is no need to rotate. You need to add it directly and fit it to the screen. How do we make it healthier towards performance? If you click on the picture after the picture is taken, there should be 3 stresses on the right side of the top; Click on it. Then we will have an option called Composition Area. If you press it, the display will heal robotically. Now click on this image, and we want to convert it to 3d. For this, click on Move and Transform and here again there are X, Y and Z axes used to edit in 3D. So you need to set the Z-axis rate to thousands because regardless of how many different levels you take, you need to make sure that there are miles on this image. However, there is a danger that the image will crop during editing. If you need armour, you can use influence. When you come back from there and click on that layer, below we have an option called Effects. Click on it. In it, click on Add Effect, and in it you have to select the Tiles option and enable the second option in it. Then you will not have any problem while doing animation. So now we have to animate each photo. First, come back there and go to Media again and add the photo that you want to edit with.
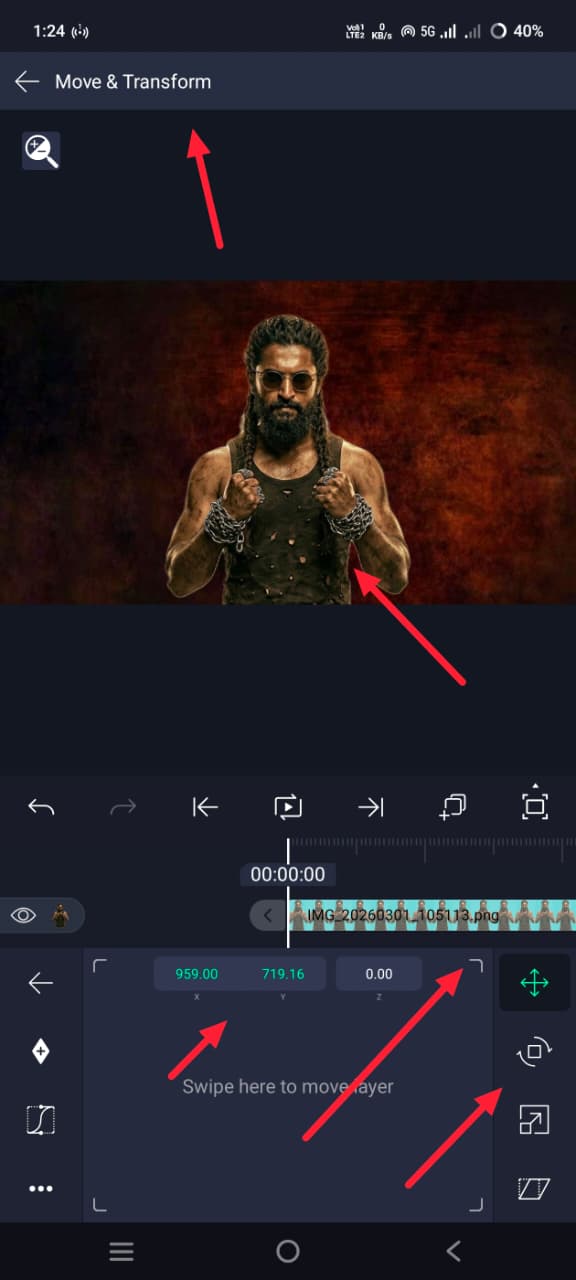 The main thing to remember here is that only photos with the background removed from your photos should be used in this because if we do not remove the background, the video will not look right and will not look professional. So after adding a photo with the background removed, we should apply a 3D effect to this photo as well. Then, as I said, go to the Move and Transform option and click on the Inertia option here and apply the effect. Here you need to take varieties of shorter length than the one taken within the inheritance. For example, if you took a thousand at the beginning, you have to take 800 or 900 or 500 here. Take this and choose a place; That means you want the location right here, put the location right there. Now, after setting the position like this,
Add Song and Lyrics
we have to select a song from the start. If we edit it, then we have to add the lyrics first, then we have to add the beats in the song, and we have to mark what the lyrics are. So after adding this song, if you add it from now on, there is a media option; there is also a music option next to it. From there, you have to add the Music. This is how much you want to create this video and delete the extra part of the audio. Then, now let’s write the lyrics, add a photo and add it together with the photo. So for these lyrics, you first come back and click on the plus icon. Here is an option called Text; click on it, listen to the song, write text and click on that text. On the top line, there you will have font; you can use that font, import the font you want and apply the font you like. After applying this, position this text and apply the Z, i.e. 3D effect, to this text layer.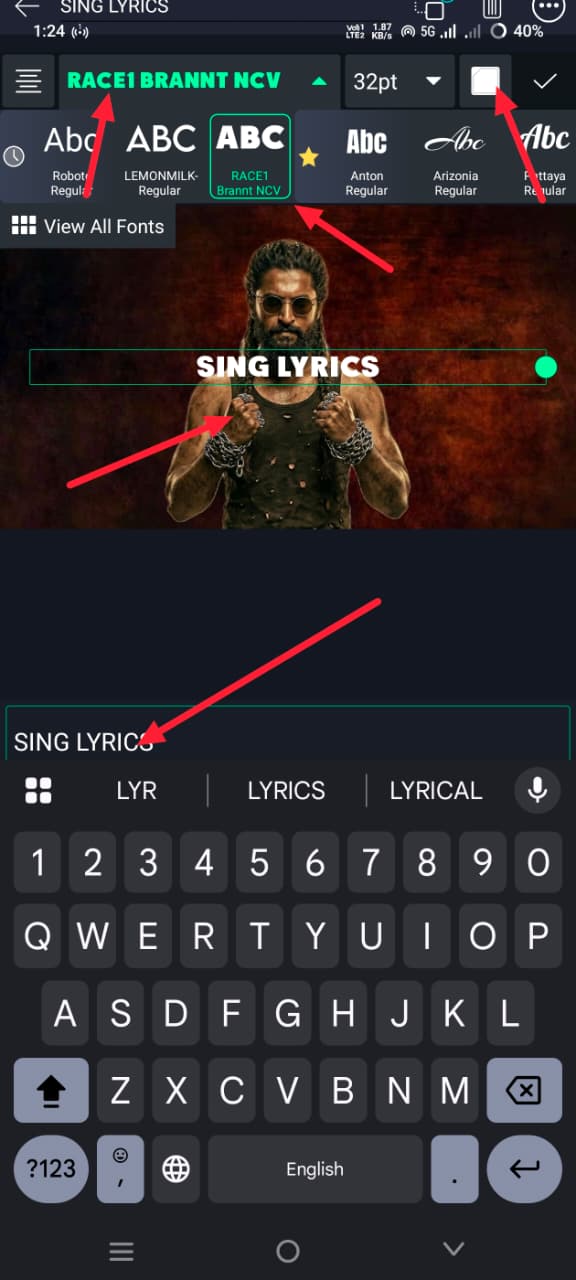 After applying this, listen to the song and keep the text animated until the lyrics are in that song. So for these animations, you should use Move and Transform again, or if you want to make the animation more stylish and complicated for this text, you can simply click on the Effects option and click on Add Effect; there you will have many effects related to the text. If you go there and apply the effect you like, then in the same way, if you want to write the next lyrics in the song, you can add a photo again and give that photo a 3D effect, add the rest of the effects and add the lyrics. If you do this, you may be very late. I will tell you a trick. Using this trick, you can write lyrics very easily. If the photo you took earlier is blurry, then you should do this setting. For this, first click on the photo, then go to Effects and search for effects there, Sharpen. If you apply this option and add as much sharpness as you want, it will appear clearer when applied to the photo. Now we need to edit the rest of the lyrics. For this, simply copy both the text and the photo that you took in the starting slide. For this, select those two and click on them. If you click on them, copy them and paste them into the next style. After pasting, just add your text and photo there. Just click on the photo that was created in that photo, click on the colour and fill option, and copy the photo from the gallery. The photo will be replaced simply. If you want to replace the text, you will have to apply all the text that you took in the starting slide. So, you just click on the layer, click on Edit Text, go into it and add the next lyrics while listening to the song. In this way, you can do lyrical editing of the song to any extent and also animate these photos. Finally, we need to apply a camera effect.
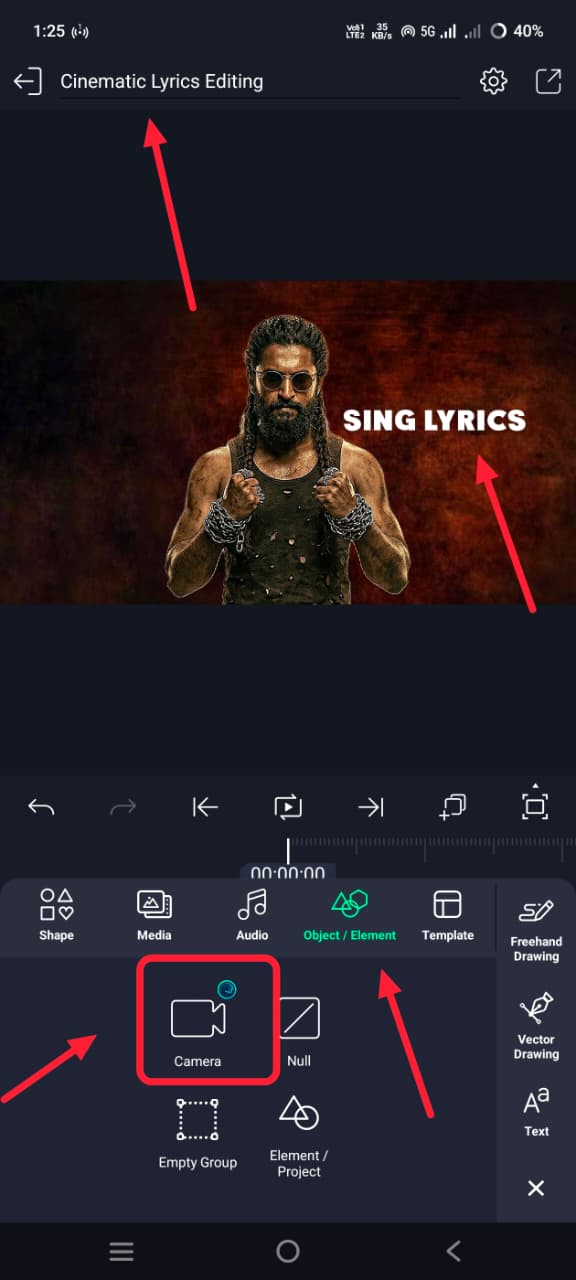 For this camera effect, you have to apply it on every slide or even after applying the camera, we can edit it, otherwise there will be confusion, so what you do first is click on the green plus icon, then we have click on the elements option here, there you have four options, in which there is a camera option, if you click on it, it will be created as a layer in the slide, if it is automatic, it will be a slide. You have to edit each slide, so take it to one side only and delete the extra one, now you can use the options in the move and transform option, you can animate it as you like, that too cinematically in 3D, so in this way we can add different animations, we can copy this camera layer again and paste it in the next other slides and make different animations.
Common Mistakes
However, you need to be very careful while importing here. A common mistake that many people make is that, to get a professional look, the timing of the layers should be proper. All the layers should be the same. If one is too much or too little, it will not give us a professional look. Be very careful about this. Also, check if everything has transitions and effects, and export it. Even while exporting, you should export in high quality, taking care of the resolution rate and bitrate. So overall, this is editing.
If you have any other doubts, you can comment.
Font Download
AM Presset Import
Hi, I’m Srikanth, the founder of Srikanth Digital Works. I concentrate on Photo, Video editing, visual design and virtual content creation. Through this website, I provide editing tutorials, suggestions, and industry insights to help builders enhance their virtual capabilities.