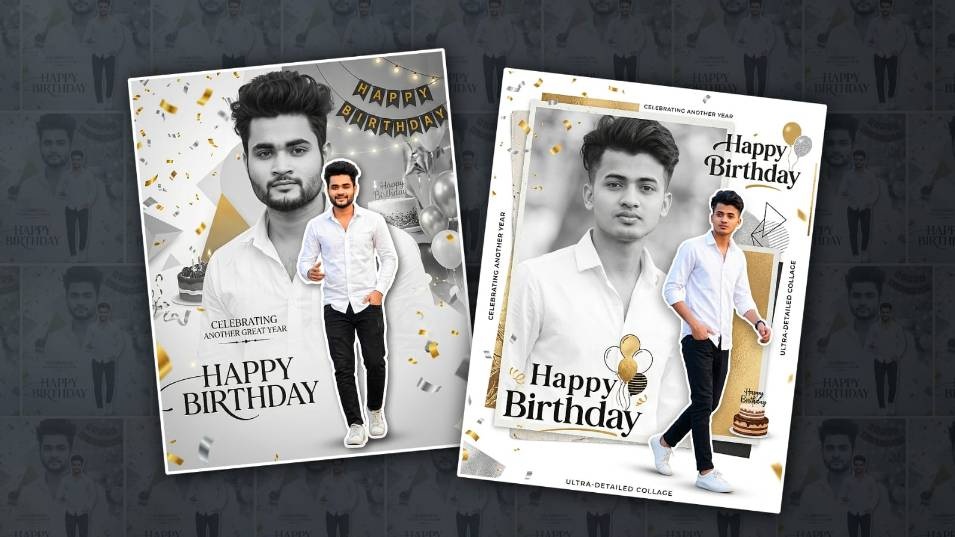
Hello friends, in this article I will clearly explain how to edit a happy birthday poster on your mobile using the Alight Motion app. Please read this article completely, and you can also use it to edit your photo. I will explain the easy process step by step; anyone can edit it.
Gather Some Material For This Edit
- To edit this photo, the Alight Motion application should be installed on our mobile.
- Next, there should be a photo of yourself, or any floral or normal plain white background photo.
- It should also be in PNG format with the background removed.
- There should also be some stylish font styles.
- Also, some banner PNG images related to the photo banner, balloon images, and cake images should also be there.
First, create a New Project.
Now let’s learn step by step, first open the Alight Motion application, there you have to select the 4:5 ratio, if you select the other ratios, the screen will be full, so it will not look that professional, so select the quality here, also select the quality, if you set the resolution as high as possible, you will get the image in HD in export, then you do not need to set the frame rate here, it is not necessary, then take the background color white or black, you can change it later.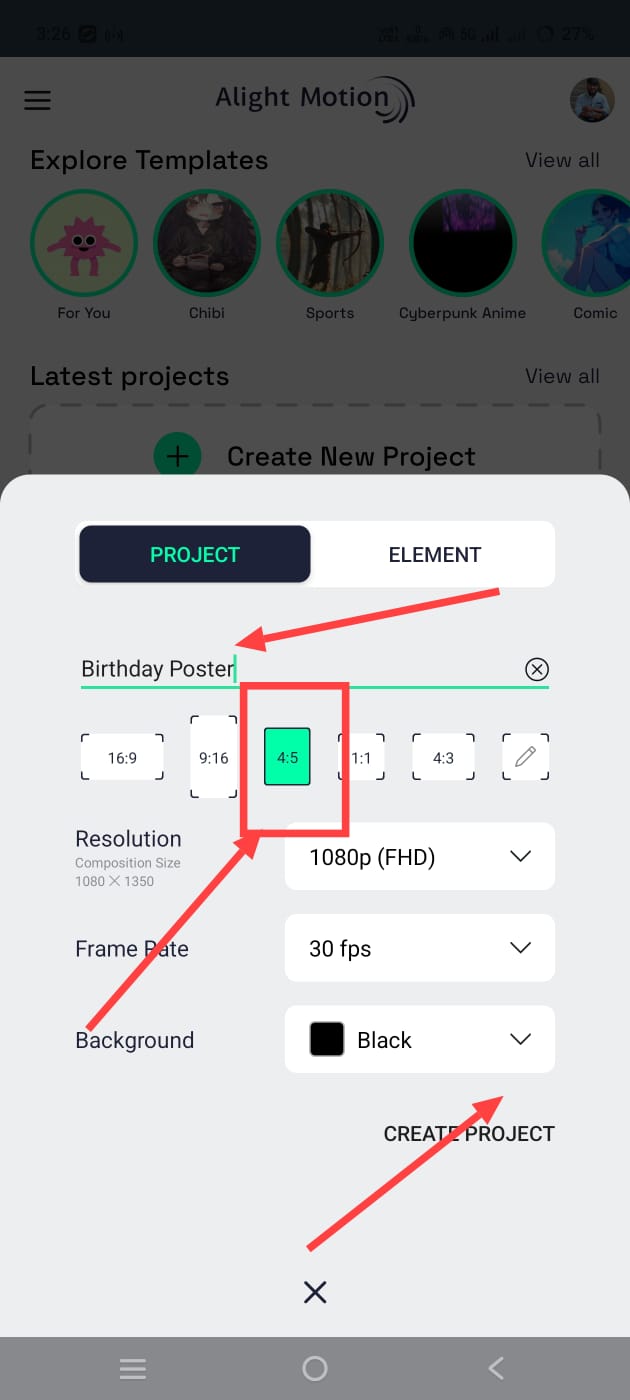 Create project. So, in every article, as is common for us, here we have the Create Project interface. Here we have to select something different. Now the timeline for the next editing will open. Here you can take an image or a shape that is in plain white colour in the background, as a default in this application, and fit it to the screen. For example, let’s take a shape. For this, click on the plus icon in green colour. There is a shapes option on the left side. Click on it. Here you click on any shape. Take a rectangle. After taking it, crop it so that it fits the screen. Now we have to change its colour. If it comes with white colour by default, leave it as it is. If not, there is a colour and fill option on the left side. Click and select white colour. Now we have a ready background, but we need to make it a little darker than completely white. For this, click on the opacity option again and reduce the opacity a little.
Adding PNG Decorative Images
Now you need to add some banners or balloons on top of this white background photo. These can be found on websites or in any application. If you find a normal photo, you can convert it to PNG. Remove the background and use it. If the photos you have taken have a white background, we can easily remove it in this application. For example, add a balloon now.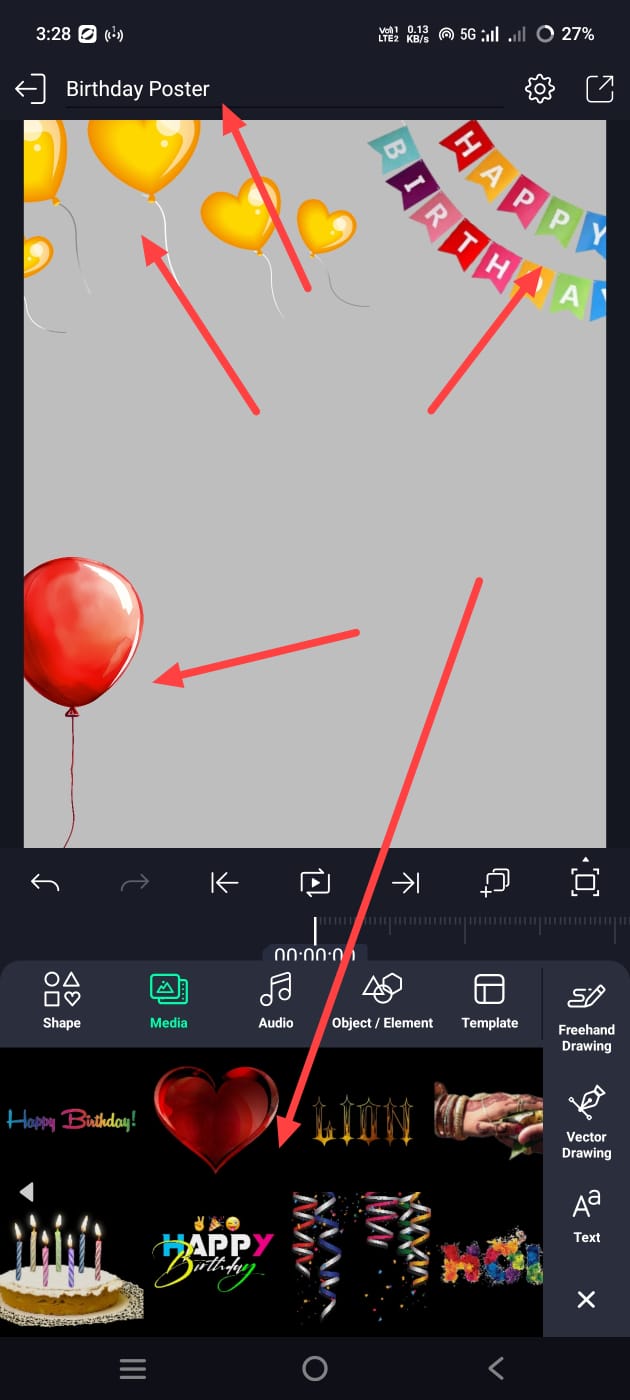 For this, click on the media option on the left side, then select the photo directly from the gallery on the mobile, then move the balloons to the place where you want to add the background of the photo, then now you need to remove the background. For this, click on the photo, then go to the effects option at the bottom on the right side, click on the add effect, apply the chroma key option or effect, and then choose the colour white; the background will be automatically removed. Now, as you said earlier, click on the plus icon in green, then click on the Media option and add some PNG images related to the banner from the gallery or add a white background. Click on the layer of these images added in this way, go to Effects, click on the effect button and select the option for chroma. Now select white there. If you select the colour of the background, the background will be automatically removed. Now, delete all the photos that are PNG.
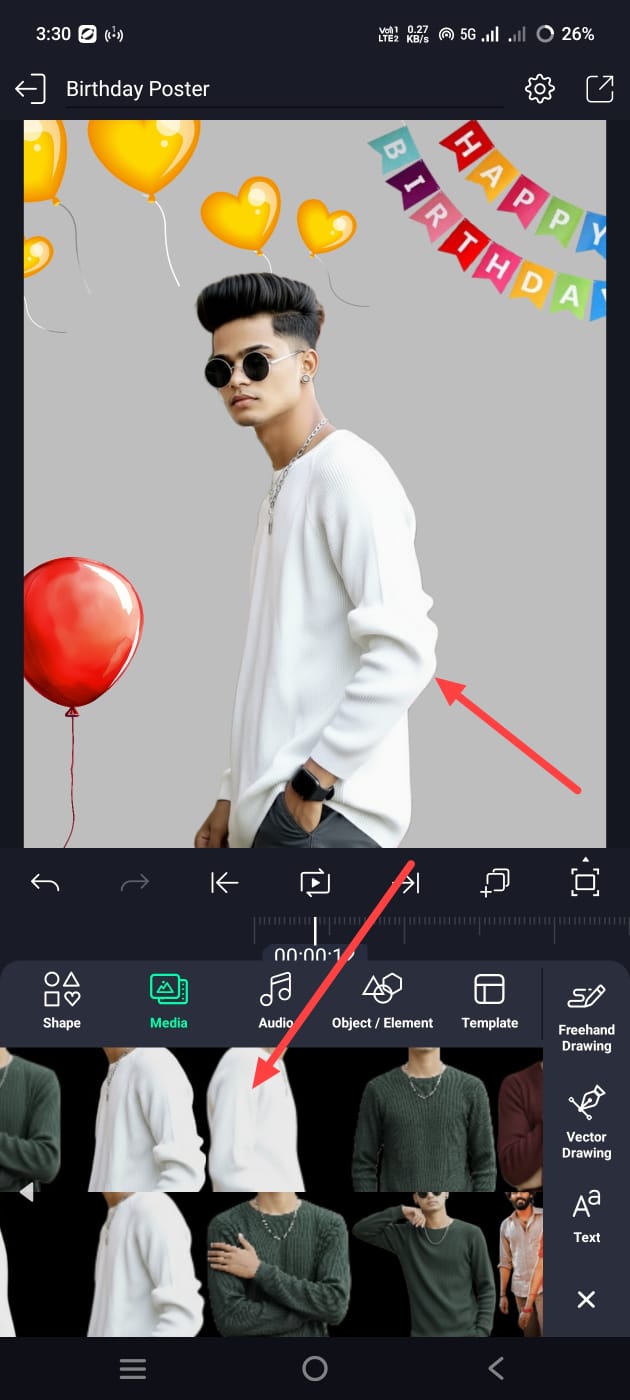 Then, add your photo. For this, click on the plus icon in green again. Then, click on the media option and select your photo. Remove the background of your photo. Only the photos that have been removed should be added here. Only then will we get a professional look.
Photo Quality Increase
After adding the photo here, you need to add an effect to make the photo HD. For this, click on the effects option. There you can add sharpness and saturation. If you get the strength you need, your photo will turn into HD. 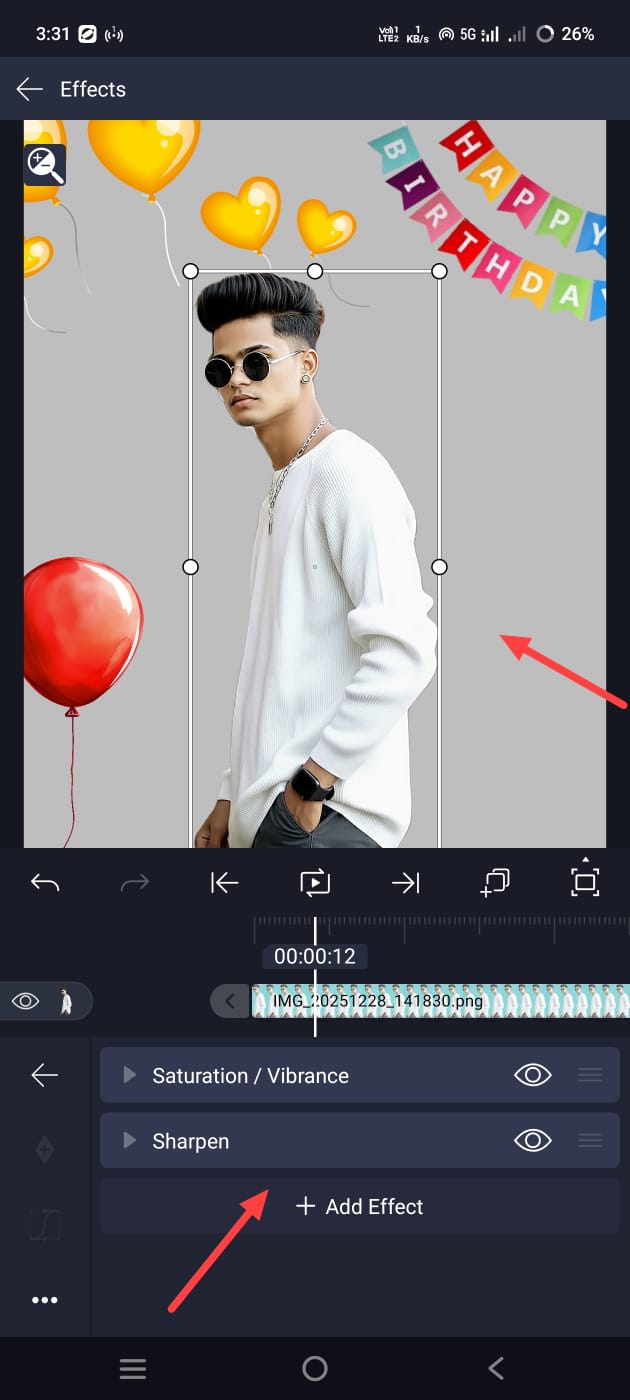 Now add your name at the bottom of your photo. Simply click on the plus icon in green. Click on the add text option and type your text. You can then make a colour option at the top with your name. You can also apply font styles. After that, you can adjust it in the centre at the bottom. After that, write the Happy Birthday text in the same way. Make sure that this text is bold and large in the background. Also, reduce the opacity. To make this photo look attractive, you should also apply some particle effects to this photo. Click on the green colour plus icon, then click on the Media option, and add an image in black screen or PNG format from the gallery. If you have taken a black screen, after adding this image, click on the image layer and then click on the effects option or the blending and opacity option. There are many blending options there. When we take a black screen, the light option or the screen option is very useful. Apply these and set the opacity to 100%, and now add this image in the corners, or you can also apply it on the photo after taking all the photos.
 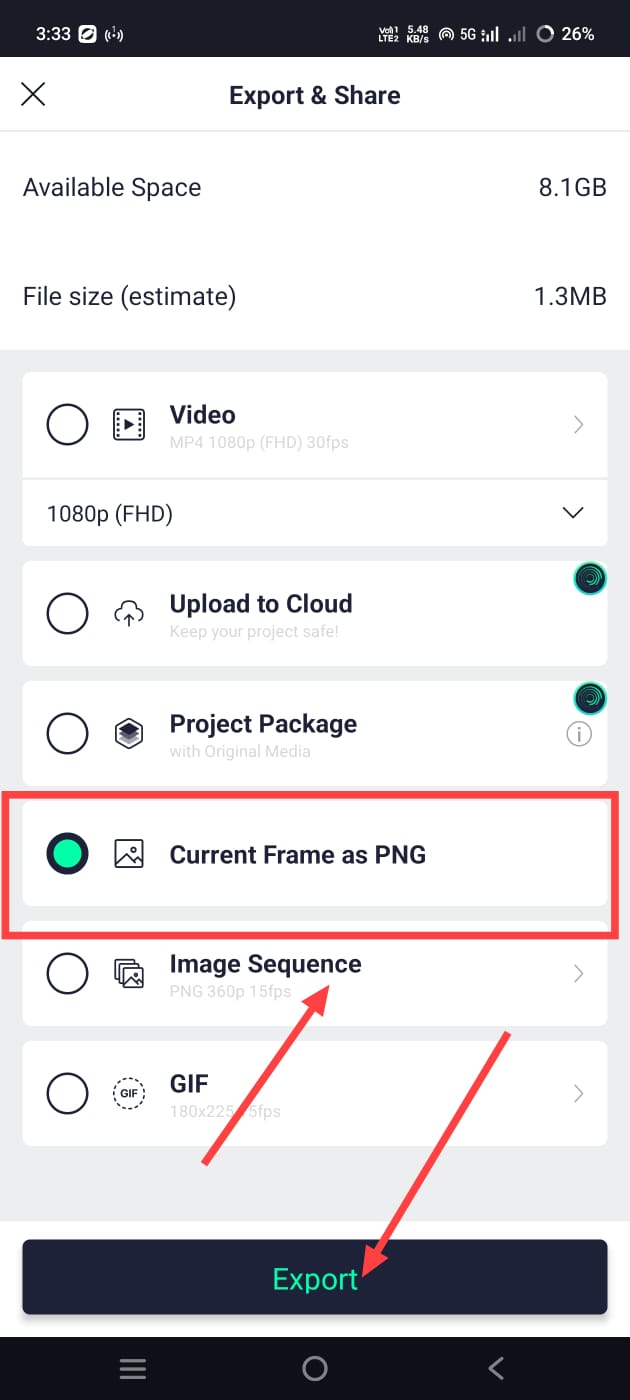 Now this photo is almost complete. So what do you do now? To save it, on the right side, there will be a share option at the top; click on it. Then there will be a current frame layer or a Current Frame as PNG. Click on that. Then you have already selected the resolution at the start, so you directly click on the export option. Then it gives you keep choice. If you click the save button, this picture can be saved to your gallery. We can also handle it without problems with AI tools. There is no such process; it is very simple. In a language that it understands, if you write the text in Telugu or English, completely clear and understandable, it will simply edit it.
Final Checks
Finally, check everything once: whether the effects are in HD or not, whether the text name is in HD, whether all the effects are added, whether the cake photo is also added, or whether all the small things like that are added. If you check everything once and export it, you will have a professional poster ready. However, there are many applications for professional editing, and this application is actually related to video editing, but in this we can also do photo editing professionally, that too in HD quality. So this is an overall article. If you doubt this or if you want more such articles, please comment; I will explain in the next article.
Prompt
Create highly unique, professional birthday photo templates in portrait collage style. Ratio 4:5. The composition features me as the central subject, presented in two layers. The primary problem within the less-correct frame is the fully shaded, sharp cutout, which I have a step forward, one hand in my pocket, and one hand forward, walking. I wear a nice white shirt, black denim and white shoes. The second layer is a mile of solid, transparent, unsaturated black and white on the surface.
Hi, I’m Srikanth, the founder of Srikanth Digital Works. I concentrate on Photo, Video editing, visual design and virtual content creation. Through this website, I provide editing tutorials, suggestions, and industry insights to help builders enhance their virtual capabilities.