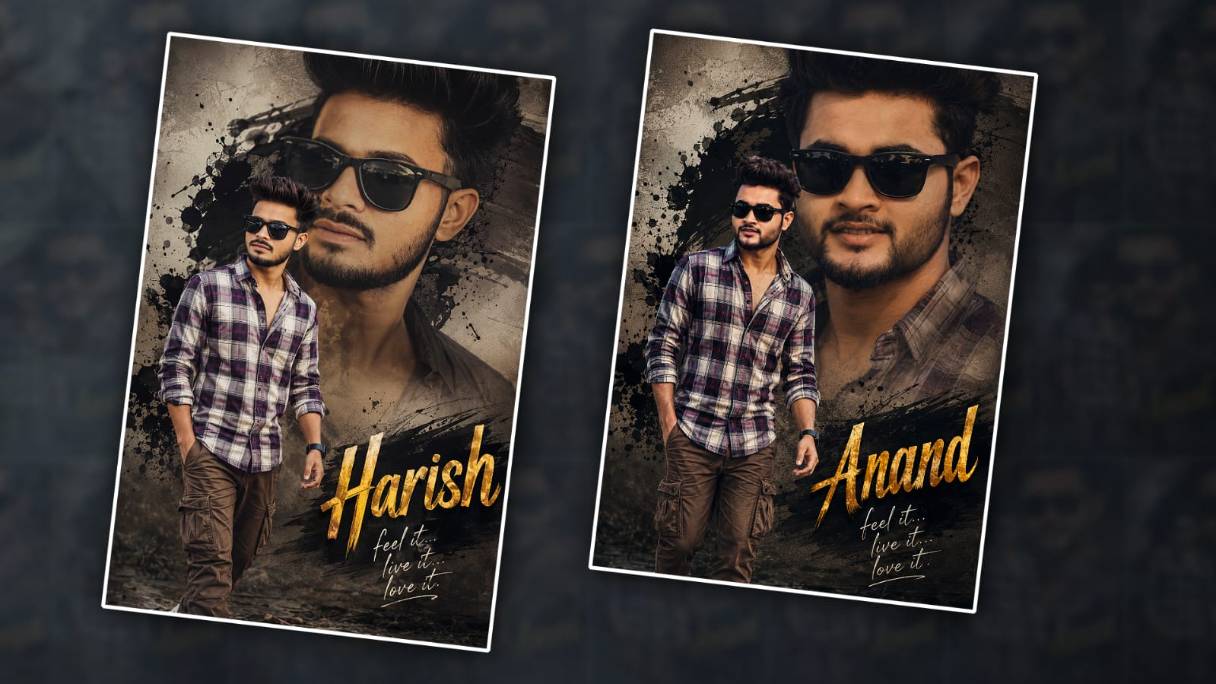
Hello everyone, welcome to another article. In this article, I will tell you how to edit a trending photo editing with name that too, in a mobile application, in HD quality that too, in the Alight Motion app. I will give a step-by-step guide. Read the article completely and edit your photo with your name; it will be simple.
First, let’s see what is required for this now
- For this Ink Splash Black screen effect photo
- Your photo background removed in PNG format
- Any colour photo in the background
- Stylish fonts that are trending
- Alight Motion application should be installed on your mobile
First, you have to install the Alight Motion application, plication and there you have to select the ratio. Here you have to select the 4: 5 ratio, or if you want it in full screen, you have to select the 9:16 ratio.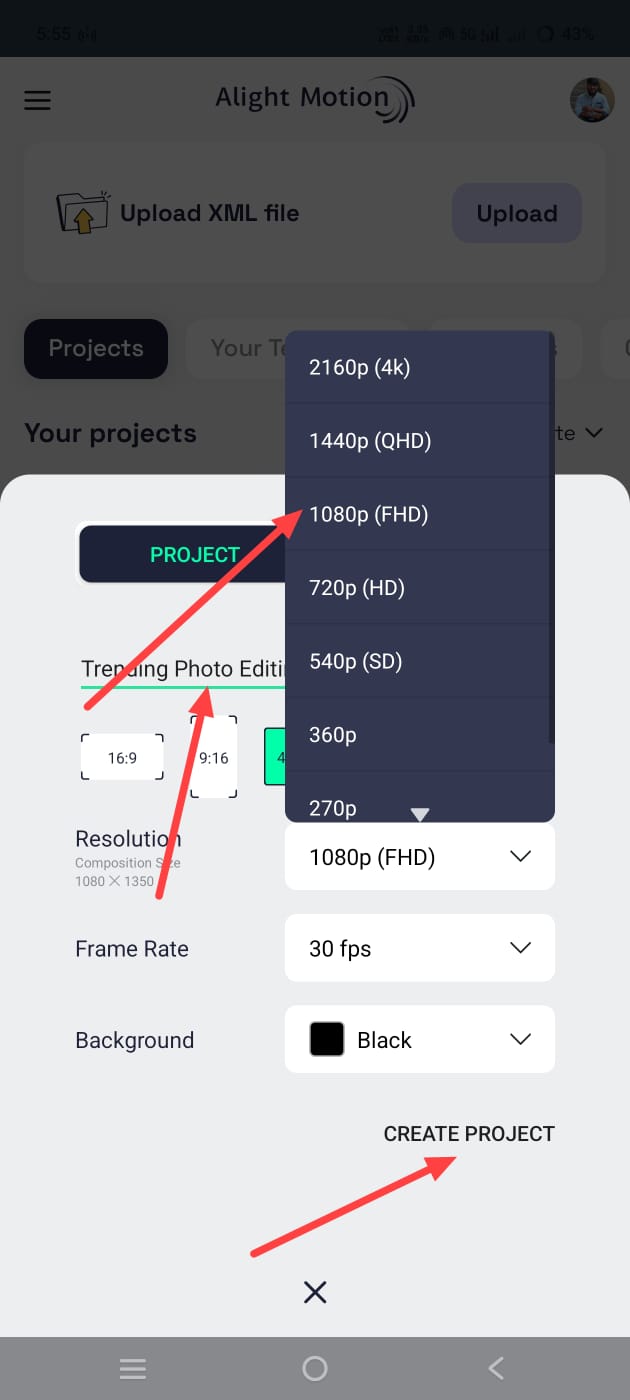 Then take the background color block and select high quality and no frame rate is required and click on create project and open it and it will go to the next step where you have to select any background photo and select only the colors that are there for example it should not be completely white but plain i.e. it should be a little dark so make sure that it is not full of colors but in plain colors. For this, click on the plus icon in green, click on the Media option and select the photo from the gallery. To fit the selected photo like this, we have these two. There is a Composition Area. If you click on it, it will fit automatically or click on this layer that you take; then you can also fit by clicking on the Move and Transform option. After that, now you have to add another photo. Another slash effect photo For this, click on the media option, before that, if you click on the plus second, this option will appear, click on this option and add the ink special effect from the gallery, after adding it, add the effect wherever you want to add the effect in this photo, after adding it, we need to apply our photo on it, that too is the same, click on the media and select the photo, only the photos with the photo background removed should be replied, add the i mean, then make a setting to make this photo appear a little HD.
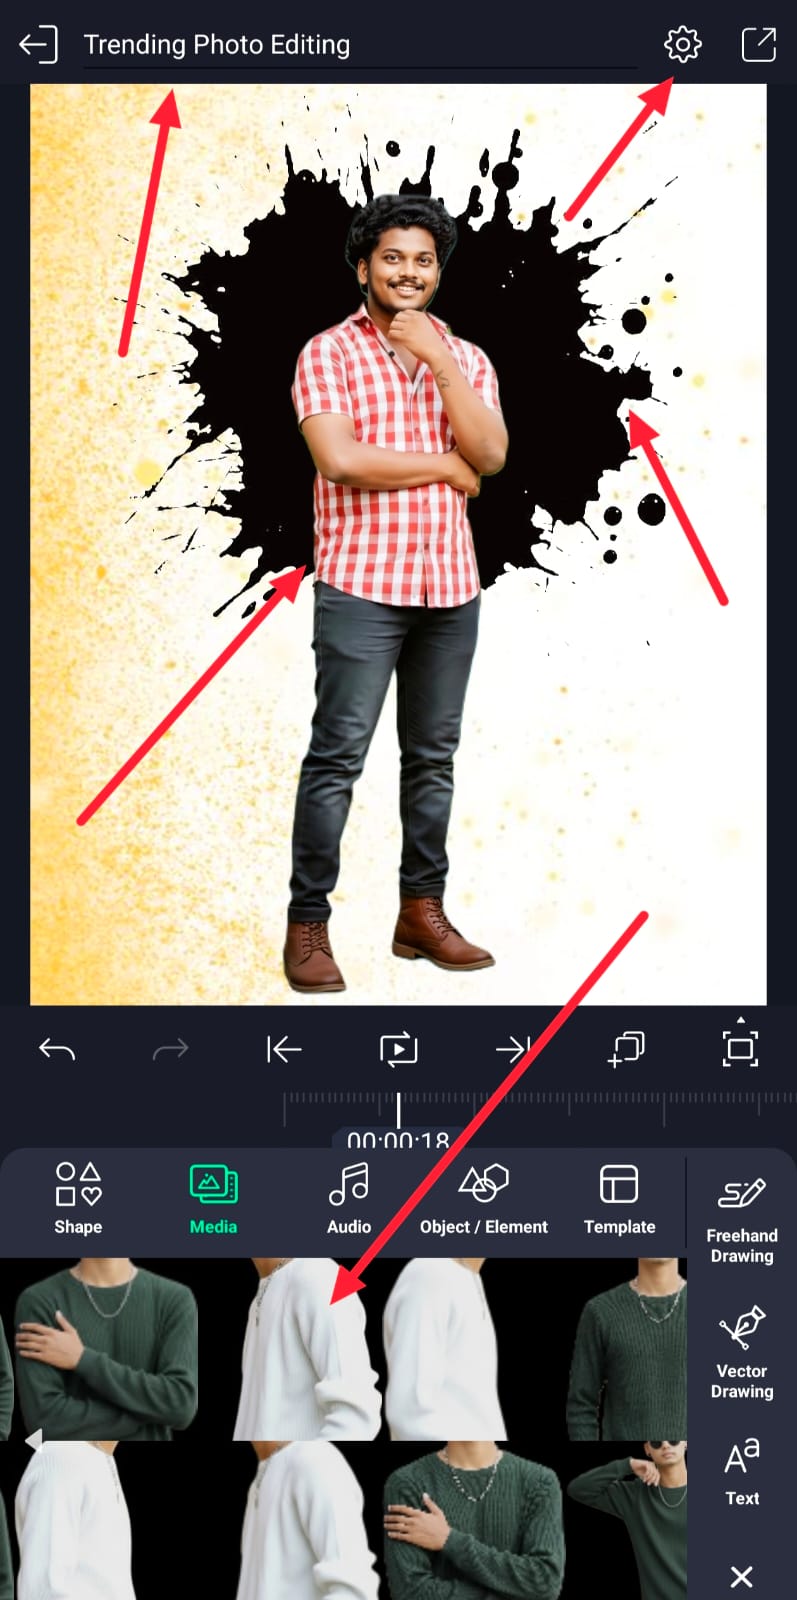 For this, after the photos you have taken are created, click on the effects option, click on the add effect and search. Using both of these, we can convert the photo to HD, then convert this photo into a splash in the background and apply the i mean effect. For this, you can edit it in two simple ways. First, if the background of the ink splash black PNG effect is white or any colour, click on that layer. Go to Effects and add an effect there. If you select the colour in this, the background will be removed. Apart from that, you can also use the effect by using Blending and Opacity without removing the background. Now there is another option in Blending and Opacity. If you use the last option, the mask option, we can get our photo in the effect that you have taken, or we can edit it in such a way that our photo comes in the effect. If the effect comes in, photo editing is attractive. You can also do it on the photo, and it is easy.
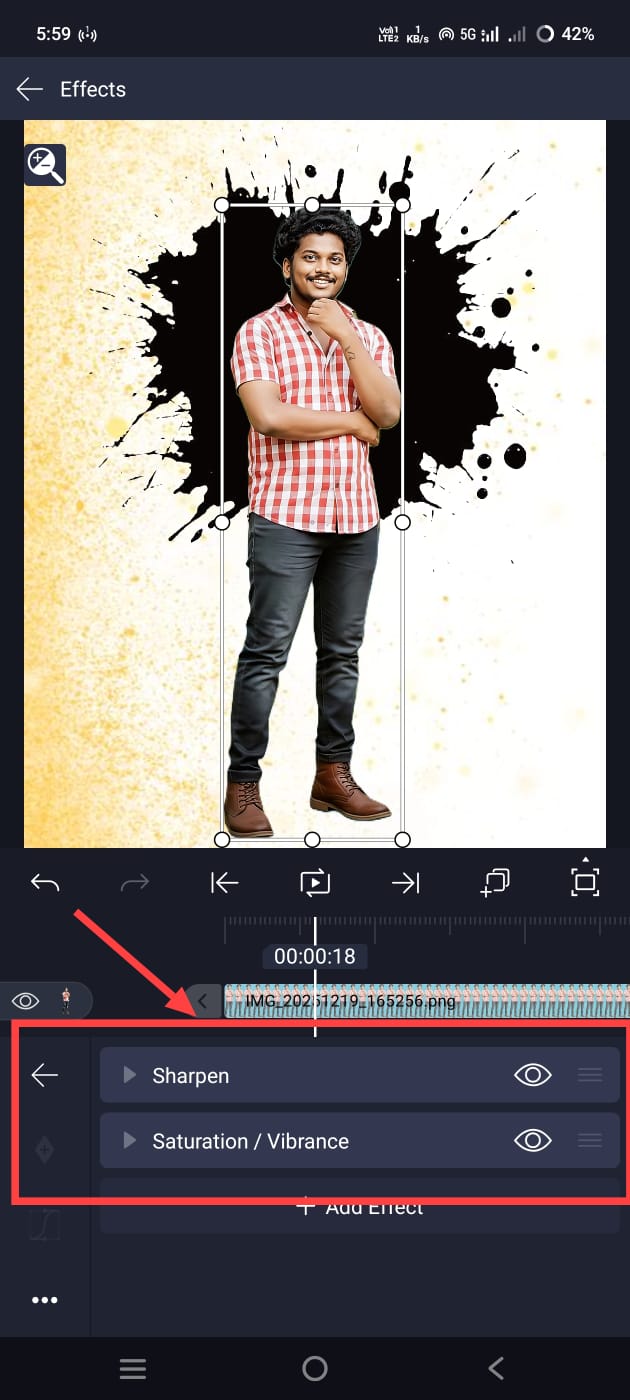 If you want your photo to look professional, you should apply a smooth effect to the bottom. For this, click on the photo again and add an effect in the effects. Its name is the Wipe option. Using this option, we can edit the bottom to be smooth.
 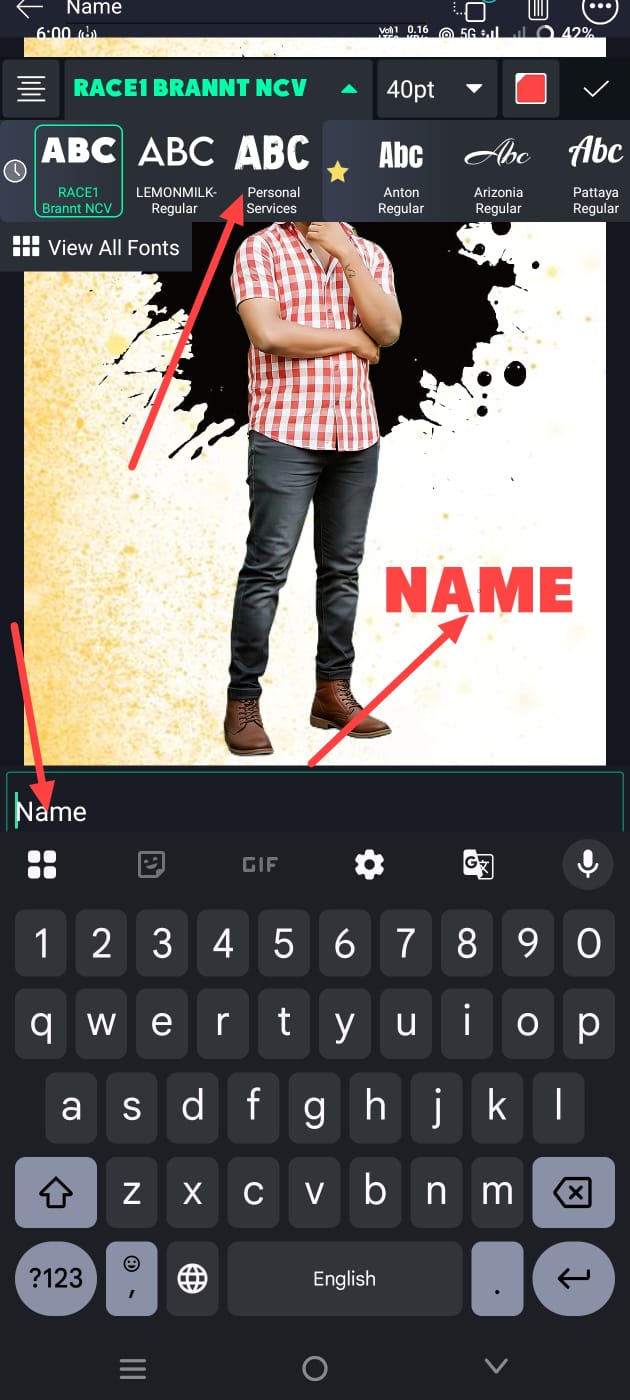 Now we need to add text, and let’s add our name to that text. For this, when you come back and it is in colour, click on the Add Text option, type your name, and enter. Take your name in it. Take any name and select the font style and colour size for this text. Place it wherever you want the photo, or, I mean, the name in the photo. Adjust it, and then you can also change colours. You can also write any quotation under that name. For this, add text as mentioned earlier, but make this text smaller in size and add it under that name. If you want to add any other effects, you should use an image with a black background. If you use images with a black screen, you will have to use blending and effects options. Using this, we can do attractive photo editing. Now, if you want to post this picture, do a bunch of tests before that to see if the distance is right or not. A not uncommon mistake that many people make is to upload the picture after the genetic removal and not beautify it now; That means they don’t convert it to HD and export it as is. Unlike these applications, we should edit the normal photo for clarity. First, edit it, align everything and then export it. It will give a professional look.
 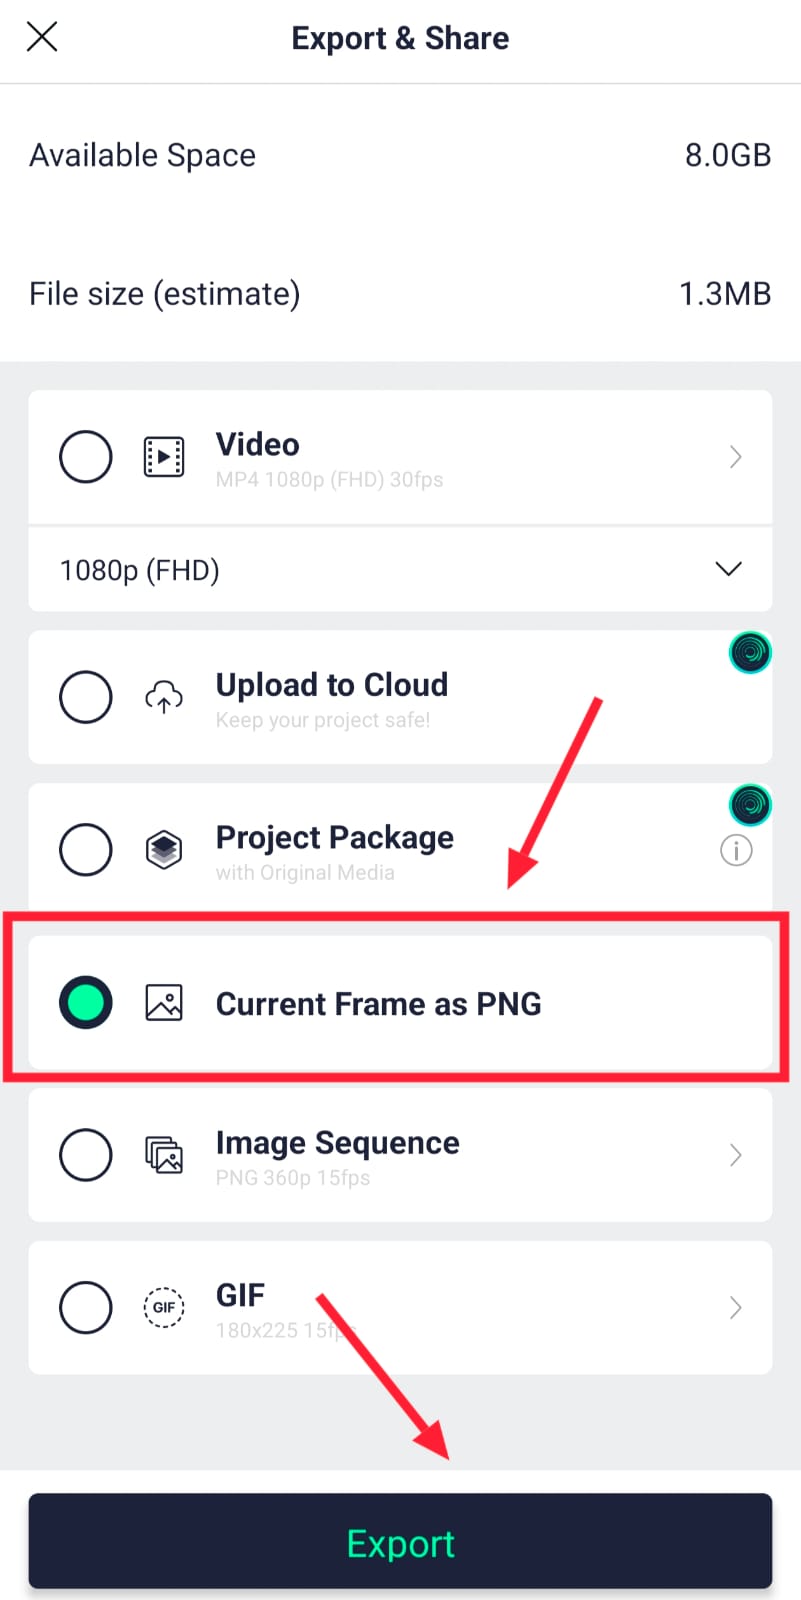 Now, share in the corner on the right side, and there you can select resolution. You can also select the ratio. Then there will be an option called Current Frame as PNG. You have to select only this. For the photo, click on it and click on the export option at the bottom. It will take some t and, a the export will be done. Then the save option will come. We can also edit this photo separately in photo editing applications. It is easy. Apart from these applications.
How to Edit With AI
We can also edit with AI tools. This is even easier. Editing is a simple tool. Open any internet site or utility and click on the plus sign to upload the images. Under the uploaded photo, you can send photo editing commands in any language, including Telugu, English, or other languages. It will understand them. Explain everything clearly. For example, suppose you want to edit your photo for a festival-related, clear, and attractive way. You should say, “I want to increase the clarity of the photo I uploaded, add pixels, add smoothness, add brightness, add my name stylishly, and edit the face in the photo I uploaded professionally without changing anything.” By giving text like this, it will edit it professionally as you think and in a way that you don’t expect. So you can edit it simply like this. However, sometimes using these tools may not produce a 100% accurate face, which is why I recommend that you use photo editing applications to edit it.
Prompt
Ultra realistic cinematic double exposure poster of a stylish Indian man with same face, fluffy dark hair, beard, black sunglasses, purple & white plaid shirt, brown cargo pants, walking pose, big close-up face in background, black ink splashes, textured grey wall background, moody high contrast lighting, romantic expression, 8k movie poster style, bold golden text “Srikanth” and stylish quote “feel it.. live it… love it”handwritten typography.
Hi, I’m Srikanth, the founder of Srikanth Digital Works. I concentrate on Photo, Video editing, visual design and virtual content creation. Through this website, I provide editing tutorials, suggestions, and industry insights to help builders enhance their virtual capabilities.