Introduction
Welcome to another editing tutorial. In this article, you will learn how to create a cinematic Ganesh Youth logo video using the Alight Motion app. This editing style looks attractive and professional, and the entire process can be completed on a mobile device.
By following the steps in this guide, you can create a logo-based video using your own youth logo, text, effects, and animations. Let’s get started.
Required Materials
Before starting the project, make sure you have the following files ready: TheThe
- Alight Motion app is installed on your mobile
- A cinematic background video clip
- A particle effect video
- A font style of your choice
- A lighting effect image
- A texture image
- Your own youth logo
- A circular fire effect video
- Music for the project
Once you have all the required files, you can begin editing.
Create a New Project
Open the Alight Motion app on your mobile device.
After opening the application:
- Select the 16:9 aspect ratio.
- Choose the required quality settings.
- Set the background colour.
- Adjust the frame rate.
- Tap Create Project.
The editing workspace will now open.
Add Music
The first step is adding music to the project.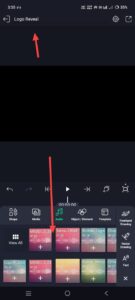 To do this:
- Tap the green Plus (+) icon.
- Select the Music or Audio option.
- Choose the music file and add it to the timeline.
Once the music is added, you can continue with the visual elements.
Add a Cinematic Background Video
Now add the background video.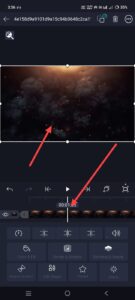
- Tap the green Plus (+) icon.
- Select Media.
- Import the cinematic background video from your gallery.
After adding the video, adjust its duration to match the project’s length.
If there is any extra footage:
- Select the video layer.
- Use the trimming tools available at the top.
- Remove the unnecessary portion.
This will keep the timeline clean and organised.
Add the Main Text
Next, add the main text for the video.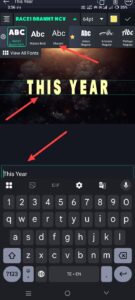
- Tap the Plus (+) icon.
- Select Add Text.
- Enter the text you want to display.
After adding the text:
- Move it to the centre.
- Increase its size.
- Apply your preferred font style.
Import a Custom Font
If you want to use a custom font:
- Select the text layer.
- Open the font section.
- Tap the three-line menu.
- Select Import Font.
- Choose the font file from your device.
Apply the font to the text and adjust it as required.
Apply a Texture to the Text
Instead of using a solid colour, you can apply a texture image to the text.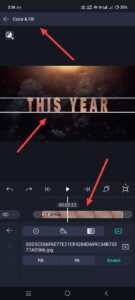 To do this:
- Select the text layer.
- Open Colourr & Fill.
- Choose the Media option.
- Select the texture image from your gallery.
The texture will now appear inside the text.
Add a Lighting Effect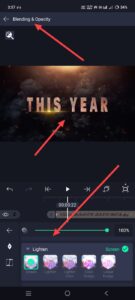
To make the text look more attractive, add a lighting effect image.
- Tap the green Plus (+) icon.
- Select Media.
- Import the lighting effect image.
After adding it:
- Select the lighting layer.
- Open Blending & Opacity.
- Choose one of the available blending modes, es such as Soft Light.
Position the lighting effect directly behind the text.
Animate the Lighting Effect
The lighting effect can also be animated.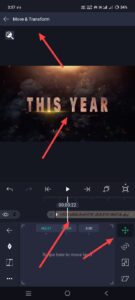
- Select the lighting layer.
- Open Move & Transform.
- Add keyframes.
- Create the required movement animation.
This adds motion to the design and makes the text look more dynamic.
Add a Particle Effect Video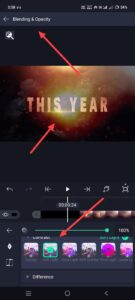
Now add the particle effect video.
- Tap the green Plus (+) icon.
- Select Media.
- Import the particle effect video from the gallery.
After adding it:
- Select the particle layer.
- Open Blending & Opacity.
- Use the available light or contrast blending options.
This helps the particle effect blend naturally with the design.
Add a Camera Layer
To create additional motion, add a camera layer.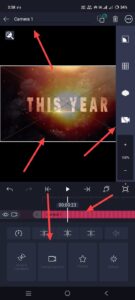
- Tap the green Plus (+) icon.
- Open the Elements section.
- Select Camera.
The camera layer will be added to the project.
Make sure the camera layer matches the duration of the current slide and remove any unnecessary extra duration.
Animate the Camera
To animate the camera:
- Select the camera layer.
- Open Move & Transform.
- Add keyframes.
- Create the desired movement animation.
This will add motion to the entire composition.
Create Additional Slides Quickly
Instead of creating every slide from scratch, you can duplicate the existing layers.
To do this:
- Select all layers from the first slide.
- Copy them.
- Paste them into the next section of the timeline.
This saves a significant amount of time.
Replace the Text
After duplicating:
- Select the text layer.
- Tap Edit Text.
- Remove the existing text.
- Enter the new text.
All previous effects, animations, and settings will remain unchanged.
Repeat this process for additional slides.
Add Your Youth Logo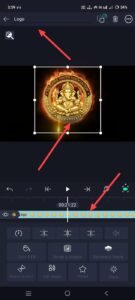
At the final stage, add your own youth logo.
- Tap the Plus (+) icon.
- Select Media.
- Import the logo from the gallery.
Position it properly in the centre and adjust its size as needed.
Add the Youth Name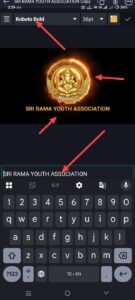
Below the logo, add the youth’s name.
- Tap the Add Text option.
- Enter the youth’s name.
- Apply the required font style and formatting.
Position the text beneath the logo for a clean appearance.
Add the Fire Effect
To make the logo section more attractive, add the circular fire effect.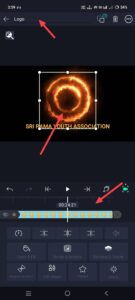
- Tap the Plus (+) icon.
- Select Media.
- Import the fire effect video.
Place this layer behind the logo.
After that:
- Select the fire effect layer.
- Open Blending & Opacity.
- Apply the Screen or lighting blend mode.
This allows the fire effect to blend properly with the logo.
Final Review
Before exporting the project, review the entire video carefully.
Some common mistakes include:
- Incorrect timing of effects and transitions
- Low-quality logos
- Low-quality video clips
- Poor-quality music
- Effects that are not synchronised properly
These issues can reduce the overall quality and professional appearance of the final video.
Take a few moments to review everything before saving.
Save the Video
Once the project is complete:
- Tap the Share option.
- Select your preferred export settings.
- Start the export process.
After exporting, save the video to your device.
Conclusion
Creating a Ganesh Youth logo video in Alight Motion is a simple process when you follow the correct workflow. By combining text, textures, lighting effects, particle effects, camera animation, and your own logo, you can create a professional and cinematic-looking video directly on your mobile phone. Review the project carefully before exporting to achieve the best result.
Frequently Asked Questions (FAQ)
Which app is used in this tutorial?
This tutorial uses the Alight Motion app.
What aspect ratio should be selected?
The project should be created using the 16:9 aspect ratio.
Can I use my own font style?
Yes. You can import and apply a custom font using the Import Font option.
How do I add a texture to the text?
Use the Colour & Fill option and select a texture image from your gallery.
Why is a camera layer used?
The camera layer is used to create movement and animation for the composition.
How can I create multiple slides quickly?
You can copy all layers from the first slide and paste them into the next section, then replace only the text.
How do I add my own logo?
Import the logo through the Media option and place it in the desired position.
What should I check before exporting?
Check the timing of effects, video quality, logo quality, music synchronisation, and overall alignment before exporting.
Fonts Download
AM Project Import
Hi, I’m Srikanth, the founder of Srikanth Digital Works. I concentrate on Photo, Video editing, visual design and virtual content creation. Through this website, I provide editing tutorials, suggestions, and industry insights to help builders enhance their virtual capabilities.