Hello everyone. Today’s topic is how to do lighting studio effect photo editing. In today’s article, I will tell you how to do it. Read the article completely and learn how to edit. You can also edit your photo. Anyone can edit it very simply. That too on mobile. That too in the Alight Motion application. Every article. Why do I edit in Alight Motion? That is, in Alight Motion, there are very easy methods and tools to edit. That is why I will explain it in the Alight Motion application. So you should also try it in the same application.
What are the required files?
- If you eliminate the background of your photo, it doesn’t count. It doesn’t matter if you don’t remove the background.
- Secondly, a photo with a lighting effect to use in the background should be in this photo plane.
- Third, the light motion should be installed on your mobile.
- Another thing to add in the background is a light effect PNG or an image like the one on the black screen behind the photo.
Now I will tell you how to do the editing using these.
First, you open this application on your mobile and select the ratio there. The ratio of your choice will open the next step. Here, first we have to add the background; that is, click on the plus icon in green colour at the bottom.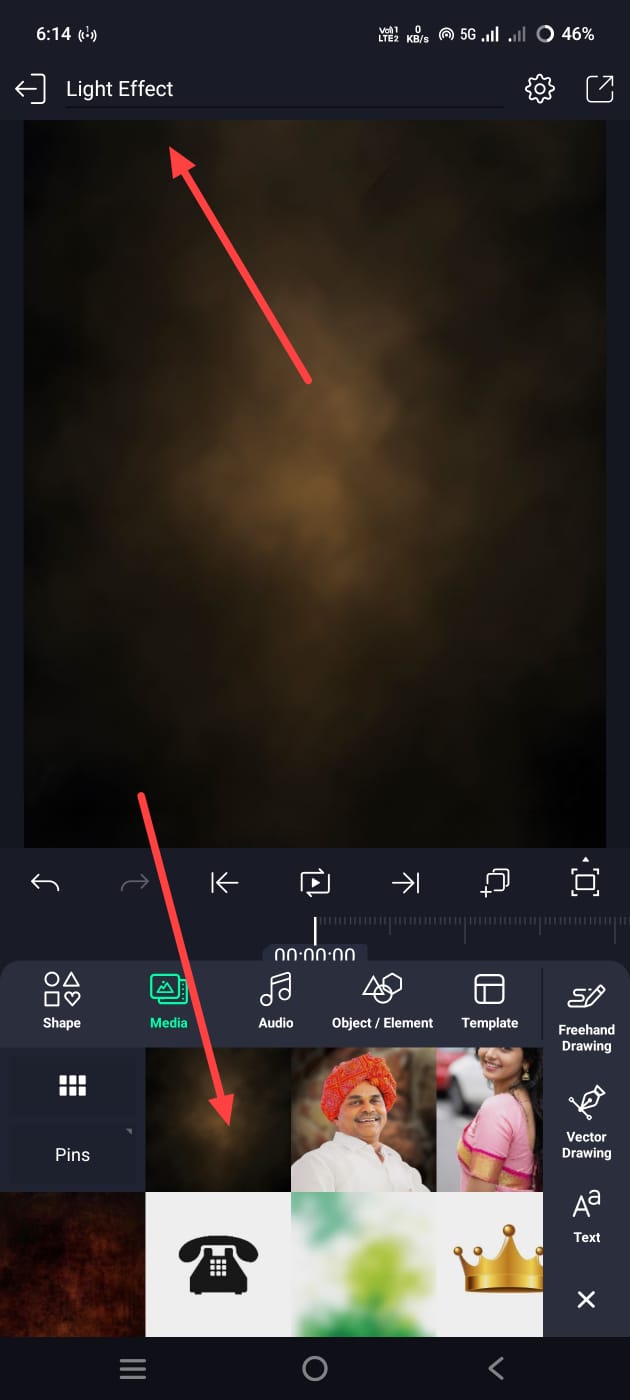 Then click on the media option and add a background image from the gallery. Now, after adding this image, we need to apply an effect to it for a professional look. For that, come back and click on the Effects option. Then click on the Add Effect option and search. Apply this Gaussian blur there and add it as little as possible without adding too much strength. In the same way, let’s add another effect. In the same way, click on the Effects option and add Gamma. Add this effect and make the settings you want.
Adding Lighting Image
Then add another lighting effect on this background.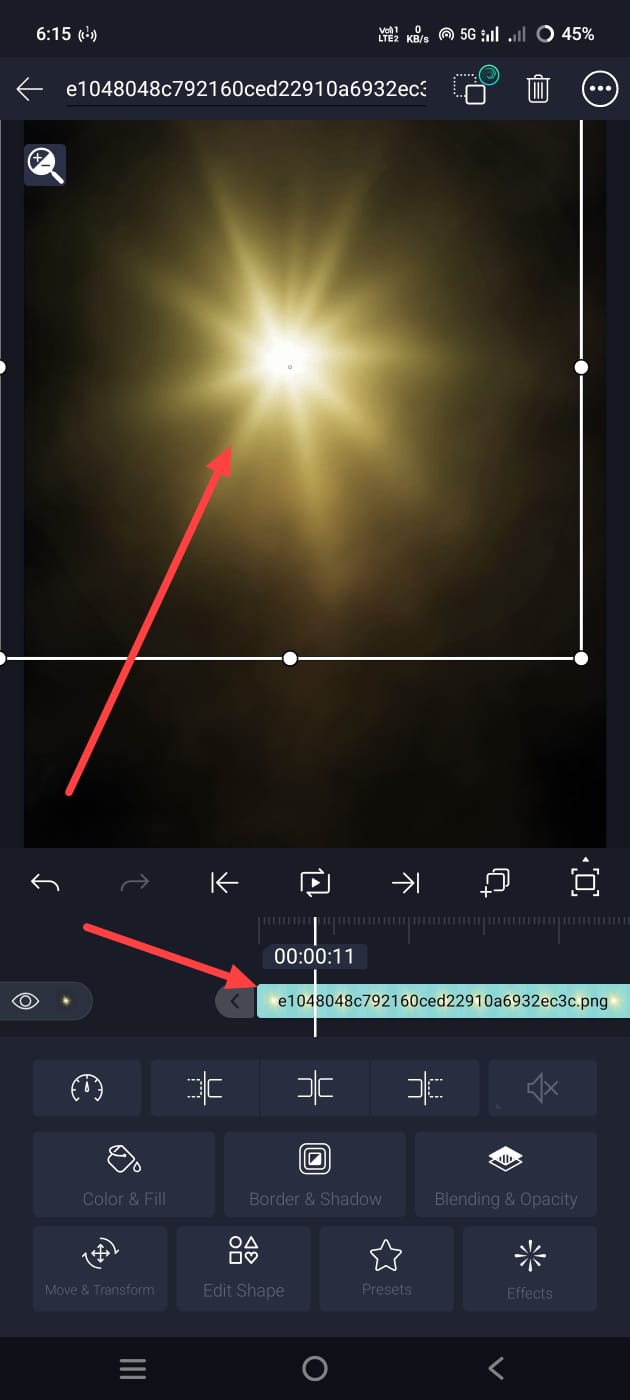 For this, come back again and click on the plus icon in green. Click on the Media option. Add this image from the gallery. After adding, click on this image layer. Select it, and now on the left side, there will be a blending and opacity option. Click on it. Then, if you scroll down a little, there will be a screen or light option. You can use either of the two options in this option. They are the same. So now we have an effect. Now move this effect wherever you want. After that, we have to add a photo of our choice. Here, usually, if you remove the background of your photo, it will be much better. If you do not remove it, it will not look that professional. If possible, try to remove it and now add the photo that has been removed. For this, come back again and click on the green plus icon at the bottom, then click on Media and add a photo from the gallery.
Apply Effects to Background Image
After adding the photo, now we need to add some pixels to that photo. Pixels mean improving the quality.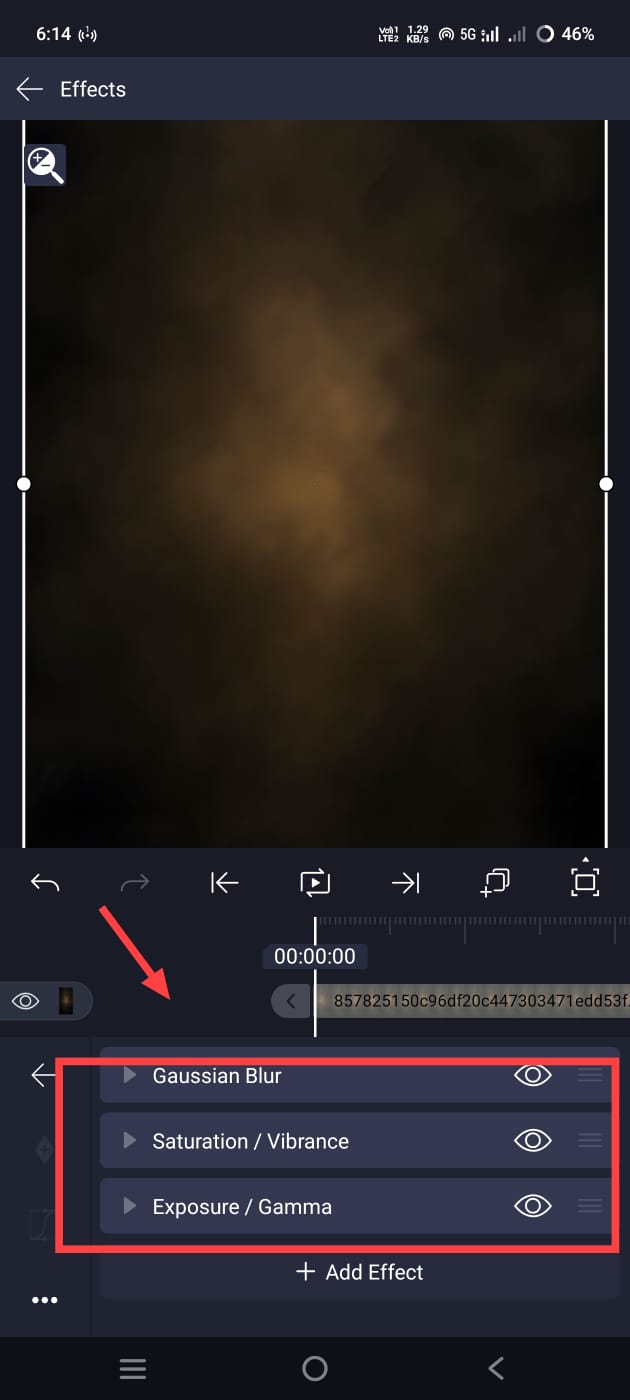 For this, simply come back and click on the photo layer. Then go to the Effects option. If we do not get HD quality, then we can only cover it using the tools available in it. In this, we need to add some colour effects like sharpness, saturation, and gamma. If you add and set it, it will look a little better than the previous one. Make photo adjustments. After taking the photo, now almost all photo editing is complete. If you want to save it, there will be a share option at the top on the right side. Click on it again. Here, we need to remember that the current frame as a PNG should be exported only by clicking on this option. Only by doing this will it be converted into an image. So now this photo will be saved to the gallery. In this way, we can also edit it with this application.
Edit with AI
If you want to edit it easily, you can use some AI tools or applications, or you can also edit using websites. Let’s see how to do that. Open any AI app, and if there is a login requirement, log in. It will be a better experience. By doing this, you can then upload your photo in it. Simply click on the plus icon on the left side and upload the photo. After uploading, under that photo, in a language that it understands- in Telugu or English- if you explain to it clearly how you want your photo edited, it will take some time and edit it. If you don’t know how to ask, for example, ask me to add lighting effects to the photo I uploaded, increase the brightness and smoothness and edit it professionally in HD quality as a cinematographer. It will simply take some time to edit it. Then click on that photo and save it as a photo. In this way, you can edit photos in both methods. If possible, you can also use separate applications for photo editing. You can easily edit photos.
Edit with PicsArt
Many people have also edited this photo in the PicsArt application, which makes it even easier and more professional in HD. 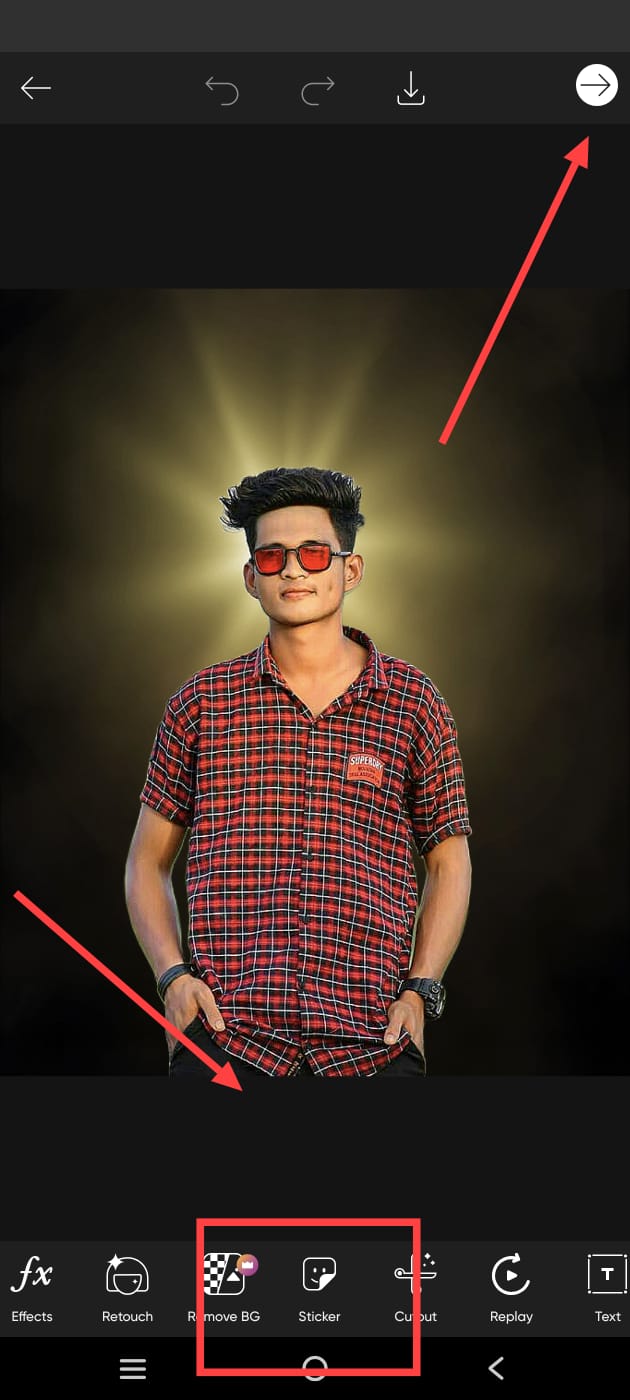 Or simply open this application. After opening it, click on the plus icon and add a background. First, add it, and now add any light effect to this background. For this, there is no need to add a separate light effect from outside. In this, after the pack comes, there are some options at the bottom. Among these options, there is an option called Sticker. Click on it; we have many PNG image effects in it. If you search in it, the light PNG of your choice will be displayed there. Click on it and add it wherever you want. In the same way, finally add your photo. For this, after you come back, click on the Add Photo option. There, select your photos from the gallery and add them. To remove the background of your added photo, again, in the options below, there is an option called Remove Background. If you click on it, the background of your photo will automatically be removed. While using this option, mobile data should be on your mobile. So now adjust this photo in the background and click on the share option on the right side. Then click on Save to Gallery, and this photo will be saved to the gallery. So you can also do editing through this app.
Prompt
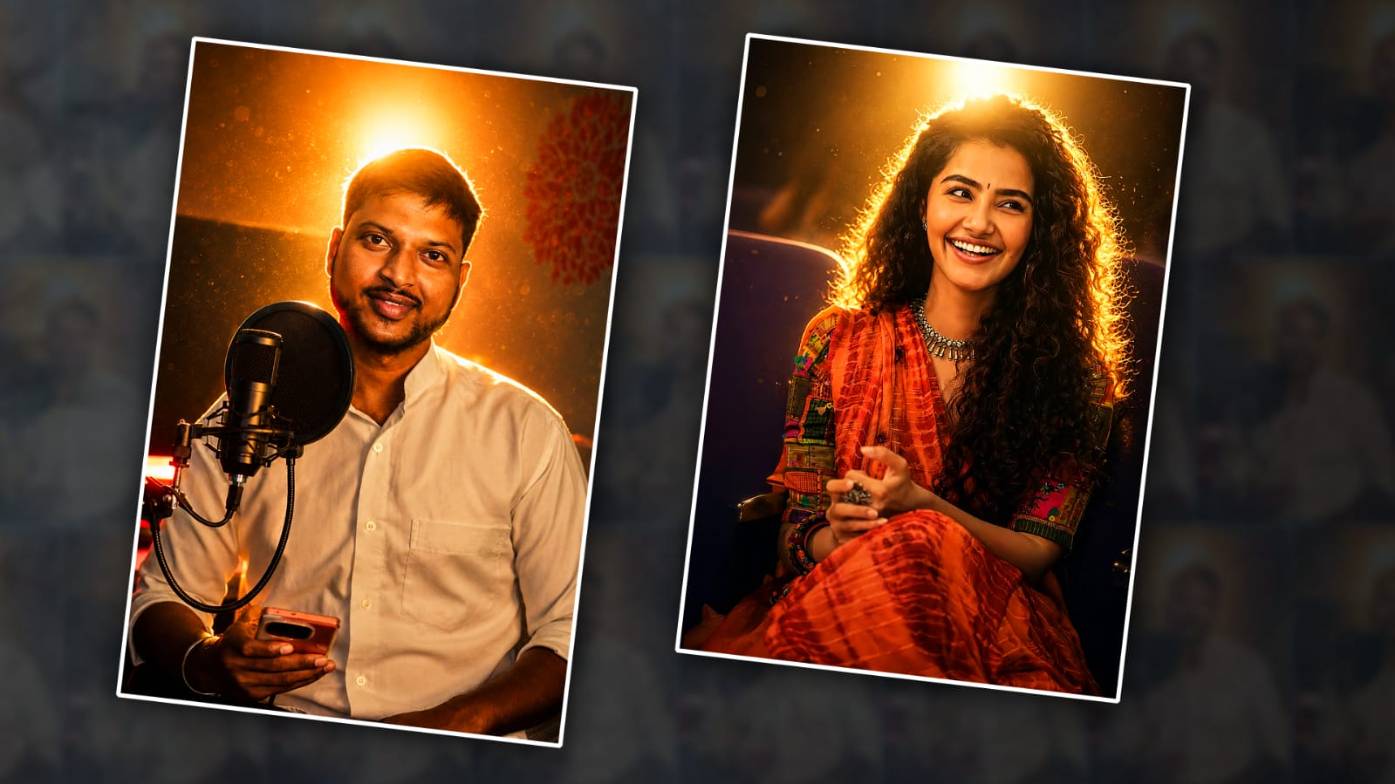
“Transform this normal portrait into a cinematic night portrait with dramatic backlighting. Add a strong, warm golden light source directly behind the subject’s head, creating a beautiful halo glow around the hair and body edges. Create realistic rim lighting on hair, face edges, shoulders, and neck. Add bold, fluffy flowers, lens lighting, a stretchy blanket that floats in the breeze, and a moody cinema light fixture. Increase contrast by keeping pores and skin texture natural and delicate.
Hi, I’m Srikanth, the founder of Srikanth Digital Works. I concentrate on Photo, Video editing, visual design and virtual content creation. Through this website, I provide editing tutorials, suggestions, and industry insights to help builders enhance their virtual capabilities.