
Introduction
Ganesh Chaturthi is one of the most celebrated festivals, and creative video edits related to the festival become extremely popular on social media every year. One of the trending styles is the cinematic Ganesh logo reveal video. These videos feature stylish text animations, logo reveals, cloud effects, cinematic backgrounds, and devotional music that create an impressive visual experience.
In this article, you will learn how to create a cinematic Ganesh Chaturthi logo reveal video using the Alight Motion app. The entire process can be completed on a mobile phone without needing a computer. By following the steps carefully, you can create your own logo reveal video using your preferred logo, name, and music.
Requirements for Ganesh Logo Reveal Video Editing
Before starting the editing process, make sure you have the following materials ready: The
- Alight Motion application is installed on your mobile
- A cloud PNG image (white or any preferred colour)
- A stylish font
- Audio containing dialogue or music
- Your logo in PNG format
- Your name or username
- A suitable background image
Once all these resources are prepared, you can begin creating the video.
Step 1: Create Project
Open the Alight Motion app on your mobile device. Tap the Create Project option and select the 9:16 aspect ratio. This ratio works well for cinematic-style videos and social media uploads.
After selecting the ratio:
- Set the resolution
- Select the frame rate
- Choose a black background
- Click Create Project
The editing timeline will now open.
Step 2: Add the Background Image
The first element to add is the background image. Tap the green Plus (+) button located at the bottom of the screen.
Select:
Media → Gallery
Choose a background image from your gallery and add it to the project.
After adding the image, it must be fitted properly to the screen.
How to Fit the Image
- Select the image layer.
- 3rd Tap the three-dot menu on the right side.
- Select Fill Composition Area.
This automatically adjusts the image to fit the entire screen.
Step 3: Apply a 3D Effect to the Background
To create a cinematic look, the background should have a 3D effect.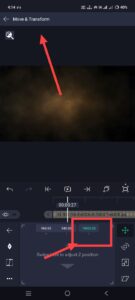 Select the background layer and open:
Move & Transform
Inside this section, you will see:
- X
- Y
- Z
The Z option is used for creating depth.
Set the Z value to 10,000.
After applying this effect, the image may appear smaller. This is normal.
To fix it:
- Open Transform.
- Select Scale.
- Increase the size until the image fits the screen properly again.
Repeat this process for any additional layers added later.
Step 4: Set the Video Duration
Now adjust the duration of the background layer.
Extend the background image on the timeline so that it matches the desired length of your final video.
This ensures the background remains visible throughout the project.
Step 5: Add Music
Music is one of the most important elements in a cinematic logo reveal video.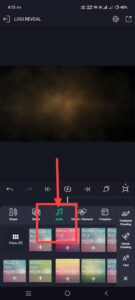 Tap the green Plus (+) button again and select:
Music
Choose your preferred audio track and add it to the timeline.
You can use music that contains dialogue, devotional audio, or lyrics.
Once the music is added, listen carefully and identify the lyric points.
Step 6: Create Beat Marks
To synchronise text with the music, create beat marks on the timeline.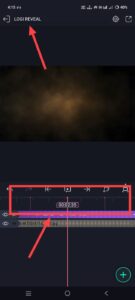 Move the cursor to the position where a lyric begins.
Tap to create a red marker.
Repeat this process for all important lyric sections.
These markers help you align text animations perfectly with the music.
Step 7: Add Lyrics
Now it is time to add text.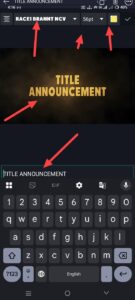 Tap the green Plus (+) button and select:
Add Text
Type the first line of lyrics.
After typing the text:
- Select a font
- Adjust the size
- Choose a suitable colour
Light yellow or another bright colour works well because it remains clearly visible against most backgrounds.
Position the text properly on the screen.
Step 8: Match Text Duration with the Lyrics
The text should appear only during the corresponding lyric section.
Trim the text layer so that its duration matches the lyric timing.
Remove any extra duration beyond the lyric segment.
This keeps the animations synchronised with the music.
Step 9: Apply a 3D Effect to the Text
To maintain consistency with the cinematic style, apply a 3D effect to the lyrics.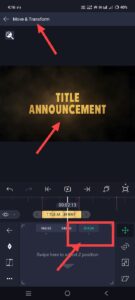 Select the text layer and go to:
Move & Transform → Z
Adjust the Z value to create depth.
This makes the text appear more dynamic and professional.
Step 10: Add Cloud PNG Effects
Cloud PNG images add atmosphere and enhance the cinematic look.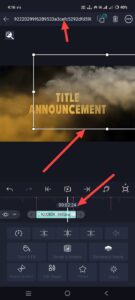 Tap the green Plus (+) button.
Select:
Media
Add two cloud PNG images.
Place:
- One cloud on the left side
- One cloud on the right side
Apply the same 3D effect to both cloud layers.
Increase their size and position them carefully around the text.
This creates an attractive layered composition.
Step 11: Add a Camera Layer
Animating every individual layer separately can take a lot of time.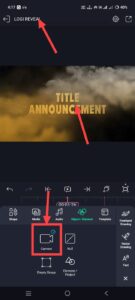 A better method is to use a camera layer.
Tap the green Plus (+) button.
Select:
Elements → Camera
Add the camera layer.
Adjust its duration so that it covers only the current lyric slide.
Remove any extra length.
Step 12: Create Camera Animation
Select the camera layer.
Open:
Move & Transform → Z
Add a keyframe at the beginning.
Adjust the zoom level.
Move to the end of the lyric section and add another keyframe.
Now reverse the zoom.
For example:
- Start with zoom in
- End with zoom out
Or vice versa.
This creates a smooth cinematic movement across the slide.
Step 13: Create the Logo Reveal Slide
The next section of the video focuses on revealing the logo.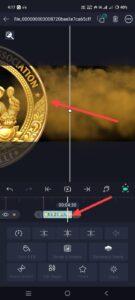 Before starting, make sure your logo is saved in PNG format.
You can design the logo using editing applications or AI tools and then save it with a transparent background.
Add the logo to the timeline on the second slide.
Apply the same 3D effect used earlier.
Step 14: Animate the Logo Reveal
Instead of showing the entire logo immediately, reveal only part of it first.
You can animate the logo from:
- Left
- Right
- Top
- Bottom
Start with the logo positioned outside the screen.
Move forward on the timeline and adjust the position so that only half of the logo becomes visible.
Add keyframes to create the movement.
This technique creates anticipation and makes the final reveal more impactful.
Step 15: Continue the Lyrics Slides
For the third slide, you can save time by duplicating the previous layers.
Copy the existing lyric slide and paste it into the next section.
Then:
- Select the text layer.
- Tap Edit Text.
- Replace the old lyrics with the next line.
Because the layers are duplicated, all animations and effects remain intact.
This significantly speeds up the editing process.
Step 16: Complete the Logo Reveal
As the video progresses, continue animating the logo.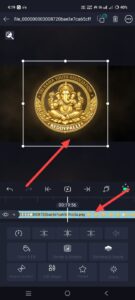 Reveal more of the logo gradually until the complete logo becomes visible.
The full logo should appear only near the end of the reveal sequence.
This creates a professional cinematic effect.
Step 17: Reveal Your Youth Name
After the logo reveal is complete, display your Youth Name or organisation name.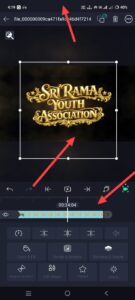 Add text using:
Add Text
Apply:
- Stylish fonts
- Proper colors
- 3D effects
You can also create the text design separately and import it into the project.
Animate the username using the same techniques applied earlier.
Common Mistakes to Avoid
Many creators make small mistakes that reduce the overall quality of the video.
Common mistakes include:
- Incorrect layer durations
- Poor timing adjustments
- Misaligned animations
- Improper transitions
- Incorrect text synchronisation
- Unbalanced logo positioning
Always review every slide before exporting.
Exporting the Video
Once all editing is complete, preview the entire project.
Check:
- Text timing
- Logo animations
- Camera movements
- Music synchronization
- Layer alignment
If everything looks correct:
- Tap the Share button.
- Verify the quality settings.
- Click Export.
Wait for the rendering process to finish.
Your cinematic Ganesh Chaturthi logo reveal video is now ready to share on social media.
Frequently Asked Questions
Which aspect ratio should I use?
Use the 9:16 aspect ratio for a cinematic appearance.
Why should I use PNG images?
PNG images support transparent backgrounds, making them easier to blend into the project.
What is the purpose of the Z option?
The Z option creates depth and produces a 3D effect.
Why should I use a camera layer?
A camera layer allows you to animate multiple layers simultaneously and saves editing time.
Can I use my own logo?
Yes. You can use any logo, provided it is saved in PNG format.
How do I synchronise lyrics with music?
Use beat marks on the timeline and match the duration of each text layer with the corresponding lyric section.
What should I check before exporting?
Review layer timing, animations, transitions, logo positioning, and music synchronisation to ensure a professional result.
Logo Prompt
Create a premium luxury 3D golden typography logo with the text “YOUR NAME HERE” in the center. Use highly detailed metallic gold lettering with elegant curves, ornamental flourishes, royal styling, glossy reflections, embossed effect, cinematic lighting, and luxury branding aesthetics. Place the text “SINCE 2025” below the main title in smaller golden font. Add decorative golden swirls, glowing highlights, depth, shadows, and a rich golden shine. Background should be transparent PNG. Ultra HD 8K quality, professional logo design, symmetrical composition, sharp details, realistic gold texture, premium typography, luxury emblem style, royal golden logo, black and gold branding look. No watermark, no extra text, only the logo design. High resolution, PNG with transparent background.
Font Download
AM Project Import
Hi, I’m Srikanth, the founder of Srikanth Digital Works. I concentrate on Photo, Video editing, visual design and virtual content creation. Through this website, I provide editing tutorials, suggestions, and industry insights to help builders enhance their virtual capabilities.