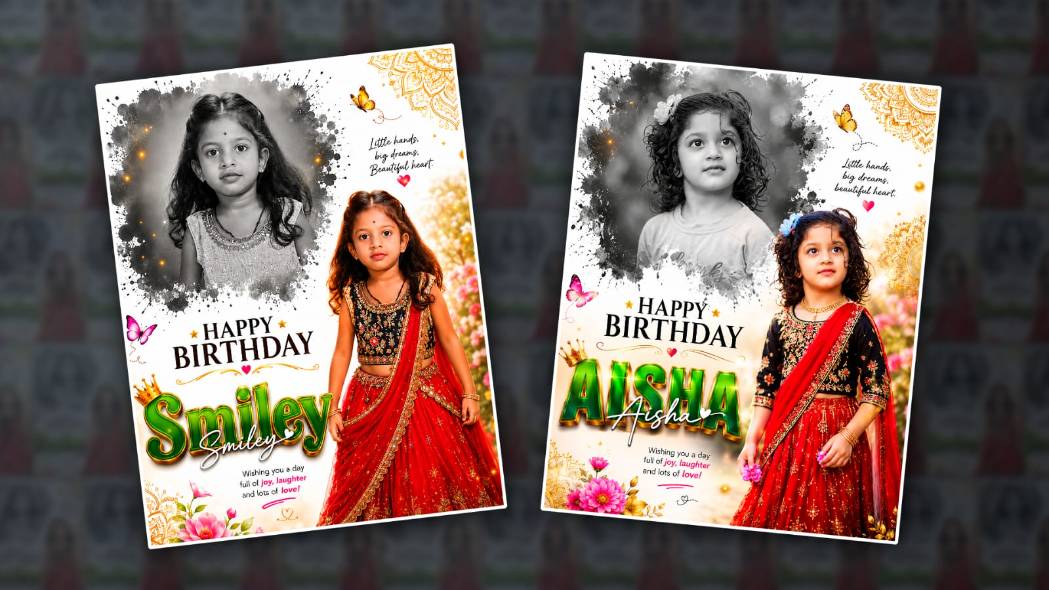
Creating a premium cinematic Happy Birthday poster for kids is a great way to make birthday celebrations more special. With the Alight Motion app, you can design a professional-looking birthday poster directly on your mobile phone. This editing style is perfect for your own children or for creating personalised birthday posters for friends and family. In this tutorial, I will explain the complete process step by step. Follow each step carefully, and you will be able to create an attractive birthday poster with a cinematic look.
Required Files
Before starting the editing process, make sure you have the following materials ready: The
- Alight Motion app is installed on your mobile device
- One or two kids’ photos
- A flower-themed background image
- Butterfly effect PNG images (optional)
- Happy Birthday text
- Stylish fonts for the child’s name
Once everything is ready, you can begin the editing process.
Create a New Project
Open the Alight Motion app on your mobile phone.
After opening the application:
- Create a new project.
- Select the 4:5 ratio, which is suitable for photo editing.
- Click Create Project.
You will now enter the editing workspace.
Add the Background Image
The first step is adding the background image.
 To do this:
- Tap the green Plus (+) icon located at the bottom-right corner.
- Select the Media option.
- Choose your flower-design background image from the gallery.
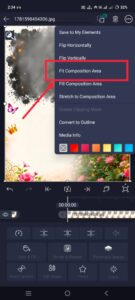
After importing the image, you need to fit it properly to the screen.
Method 1: Fill Composition Area
- Select the background layer.
- Tap the three dots in the top-right corner.
- Choose Fill Composition Area.
The image will automatically fit the screen.
Method 2: Move & Transform
- Select the background layer.
- Open Move & Transform.
- Adjust the image size manually until it fits properly.
Use whichever method is more comfortable for you.
Add Decorative Elements
Before adding the main photo, you can place decorative PNG images on the background.
Examples include:
- Butterfly effects
- Decorative PNG elements
Import these PNG files through the Media option and position them where they look best.
These small decorations help improve the overall appearance of the poster.
Add the First Kid’s Photo
Now it’s time to add the first photo.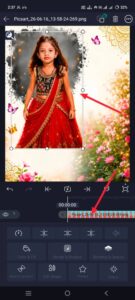
- Tap the green Plus (+) icon.
- Select Media.
- Import a baby or kids’ photo from your gallery.
After adding the photo, place it on the poster according to your design.
You can also position it near the upper-left section if you plan to create an artistic black-and-white effect.
Increase Photo Quality
Before applying other effects, improve the photo quality.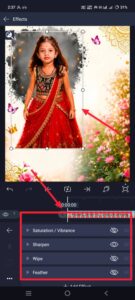 To do this:
- Select the photo layer.
- Open Effects.
- Tap Add Effect.
Apply effects such as:
- Color adjustments
- Saturation
- Gamma
These effects help improve the overall look and quality of the image.
Make small adjustments until you achieve a balanced result.
Apply Smoothness
To make the image blend naturally with the design, apply a smoothness effect.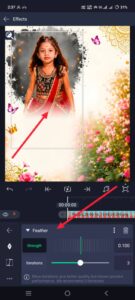 Follow these steps:
- Select the photo layer.
- Open Effects.
- Search for the Feather effect.
- Apply the effect and adjust the settings.
This helps create softer edges and a cleaner appearance.
A smooth blend makes the poster look more professional.
Convert the First Photo to Black and White
The first photo should have a black-and-white appearance.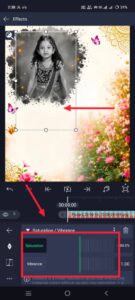 To create this effect:
- Select the photo layer.
- Open Effects.
- Tap Add Effect.
- Search for the saturation-related effect.
- Reduce the strength in the negative range.
As the saturation decreases, the image gradually turns black and white.
This effect creates a cinematic look for the background portrait.
Add the Second Kid’s Photo
Now add the second photo.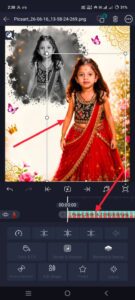
- Tap the green Plus (+) icon.
- Select Media.
- Import another kid’s photo from your gallery.
Position this photo slightly lower and toward the right side of the poster.
This image will become the main colourful subject of the design.
Enhance the Second Photo
The second photo should remain colourful and attractive.
Apply the same quality-improving effects used earlier:
- Saturation
- Color correction
- Gamma adjustments
Increase the colour slightly to make the image stand out.
This helps create contrast between the black-and-white background photo and the colourful foreground photo.
Apply Smoothness to the Second Photo
Just like the first image, the second photo also needs smooth blending.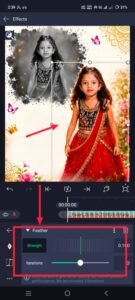
- Select the second photo layer.
- Open Effects.
- Search for the smoothness-related effect.
- Apply and adjust it carefully.
This creates a cleaner and more polished appearance.
Add the Happy Birthday Text
Now it’s time to add the main birthday message.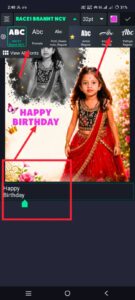 To do this:
- Tap the green Plus (+) icon.
- Select Add Text.
- Type:
HAPPY BIRTHDAY
After entering the text:
- Increase the size
- Choose a suitable font style
- Set colour to white
- Use capital letters
Position the text slightly above the centre of the design.
Add the Child’s Name
After adding the birthday text, add the child’s name.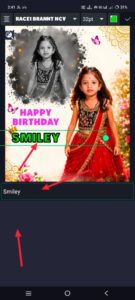
- Tap the Plus (+) icon again.
- Select Add Text.
- Enter the name.
Customise the text by:
- Applying a different font
- Choosing a special colour
- Adjusting the size
The name should look unique and attractive compared to the main heading.
You can duplicate the text and make small edits if needed to achieve the desired appearance.
Final Checks
If you would like to add more decorative elements, use the Media option to import additional PNG images.
Position them carefully around the design.
Make sure everything remains balanced and visually appealing.
At this stage, your birthday poster is almost complete.
Common Mistakes to Avoid
Many beginners make small mistakes that reduce the professional appearance of the final poster.
Some common mistakes include:
- Not removing the background properly
- Skipping smoothness effects
- Poor photo alignment
- Incorrect text placement
- Low-quality images
- Weak color adjustments
Even small mistakes can affect the overall quality of the design.
Before saving the project, carefully review every element.
Saving the Poster
Once everything is complete:
- Tap the Save option.
- Select Current Frame as Image.
- Save the poster to your device.
Your cinematic birthday poster is now ready.
Improving Quality in HD
Although Alight Motion provides excellent editing options, you can improve the final image quality further using another application.
For example, you can use the Remini app to enhance the image and save it in HD quality.
This can help improve overall clarity and sharpness.
Conclusion
Creating a premium cinematic Happy Birthday poster in Alight Motion is simple when you follow the correct steps. By combining a beautiful flower background, decorative elements, black-and-white effects, colourful portraits, stylish typography, and smooth blending, you can create a professional-looking birthday poster directly from your mobile phone.
Take your time while editing, pay attention to small details, and review everything before exporting. With proper adjustments, you can create attractive birthday posters for your kids, family members, or clients with ease.
Frequently Asked Questions (FAQ)
1. Which aspect ratio should I use for this birthday poster?
You should use the 4:5 ratio, which is suitable for photo editing.
2. Can I use more than one kids’ photo?
Yes. This tutorial uses two photos: one black-and-white photo and one colourful photo.
3. What type of background should I use?
A flower-themed background image works best for this design.
4. Which effects are used for quality improvement?
Colour adjustments, saturation, and gamma-related effects are used to improve image quality.
5. How can I create a black-and-white effect?
Reduce the saturation value into the negative range until the image becomes black and white.
6. How do I make the photos blend smoothly?
Apply the Feather effect to create smoother edges and a cleaner appearance.
7. Can I add decorative PNG images?
Yes. Butterfly effects and other decorative PNG elements can be added through the Media option.
8. How can I improve the final image quality?
After editing, you can use the Remini app to enhance the image and save it in HD quality.
Prompt
Create a premium cinematic birthday poster using my uploaded photo. Design a beautiful dual-photo composition. Place a large black-and-white artistic portrait of me in the upper left with watercolor splash and ink brush effects. Add a colorful high-quality full-body portrait on the right side with a confident pose. Use a clean white background with luxury golden mandala patterns in the corners, soft butterflies, floral decorations, golden sparkles, bokeh lights, and elegant festive elements.
Add stylish typography: “HAPPY BIRTHDAY”
Below it, add the name: “[YOUR NAME]”
The name should be in large glossy green and gold 3D text with premium shine and depth. Add a stylish signature-style handwritten version of the name overlapping the 3D text.
Include the quote: “Wishing you a day full of joy, laughter and lots of love!”
Add another elegant quote: “Little hands, big dreams, beautiful heart.”
Use professional color grading, ultra-HD quality, realistic lighting, sharp details, premium poster design, luxury birthday theme, social media trending style, 8K resolution, high contrast, vibrant colors, elegant composition, studio-quality editing. 3Aspect Ratio: 4:5 (Instagram Post)
Hi, I’m Srikanth, the founder of Srikanth Digital Works. I concentrate on Photo, Video editing, visual design and virtual content creation. Through this website, I provide editing tutorials, suggestions, and industry insights to help builders enhance their virtual capabilities.